


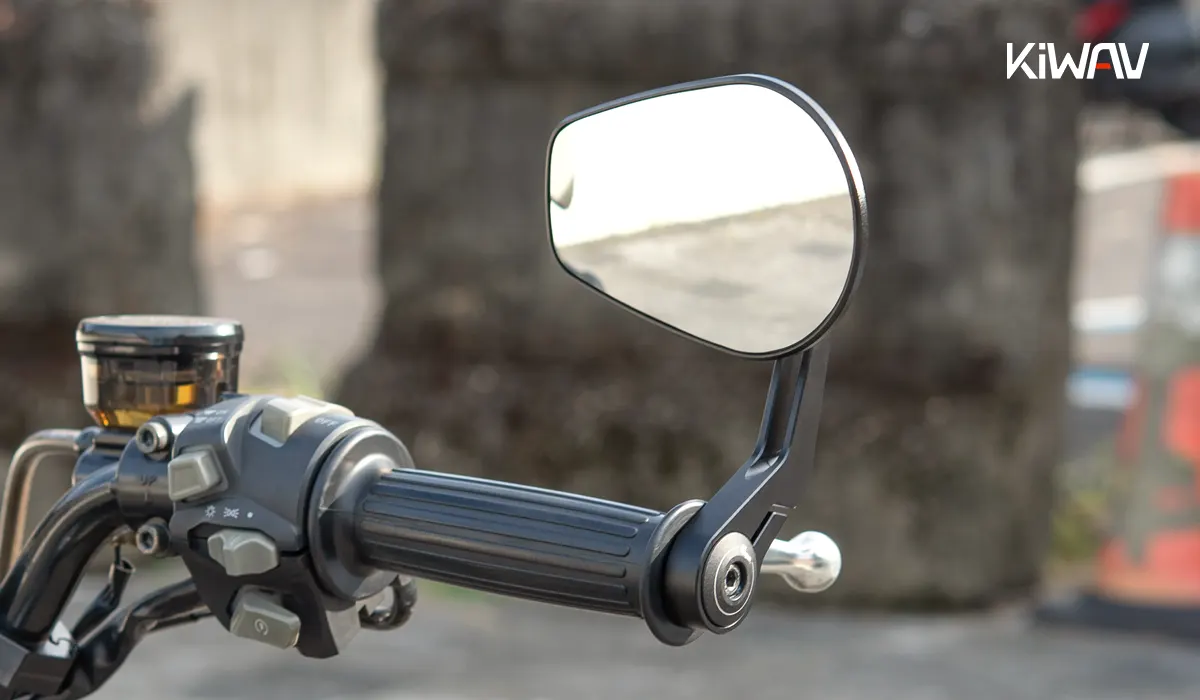
So you've confirmed that your bike is ready for Bar-End Mirrors.
Now the goal is simple: to help you identify what is hidden inside your handlebar so you can choose a mirror that mounts securely and provides a clear view without interfering with your controls.
Whether your motorcycle has Hollow Bars, Solid Bars, Threaded Inserts, or Internal Weights, this guide walks you through the exact checks needed before buying.
Not sure what setup you have? Looking for mirrors other than handlebar mirrors? Check out this guide first→ Motorcycle Mirror Fitment Guide: Will These Mirrors Fit My Bike?
Quick Answer: How to Check Bar-End Mirror Fitment?
- Hollow Bars: Check the internal diameter for expansion kits, or the outer diameter if you prefer clamp-on mounting.
- Threaded Bars: Check the thread size and the bar-end surface for direct bolt-on mounting. Alternatively, check the outer diameter for clamp-on mounting.
- Solid Bars: Check the outer diameter for clamp-on mounting, or consider modifying your handlebar to a threaded or hollow one.
- Occupied Internals: For bars with internal weights or electronic throttle (ride-by-wire), check the outer diameter for clamp-on mounting.
- Always verify tank clearance at full lock, lever operation, and grip space.
Peek Inside — Identifying Your Handlebar Type
To know which mirror system you need, you must first remove your existing bar-end weights or plastic plugs (If your bike has closed-end grips, you’ll need to remove them to see the actual handlebar end). Most are secured by a single hex bolt. Once removed, look inside the bar end.
1. Hollow Bars (The Clean Slate)
If you see an empty, smooth-walled tube, you have hollow bars.
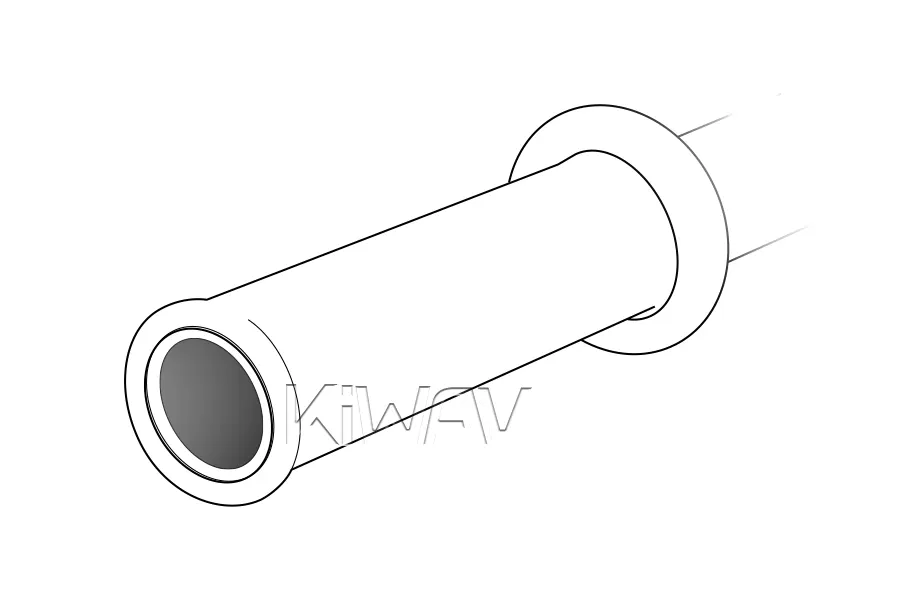
- Best Mounting: Expansion Components Systems. This uses a sleeve that expands against the inner walls as you tighten the bolt.
- Alternative: Clamp-on, if you have enough usable outer tube space for mirrors.
2. Threaded Bars (The Direct Connection)
If you see a threaded hole welded or machined into the bar, you have threaded inserts.
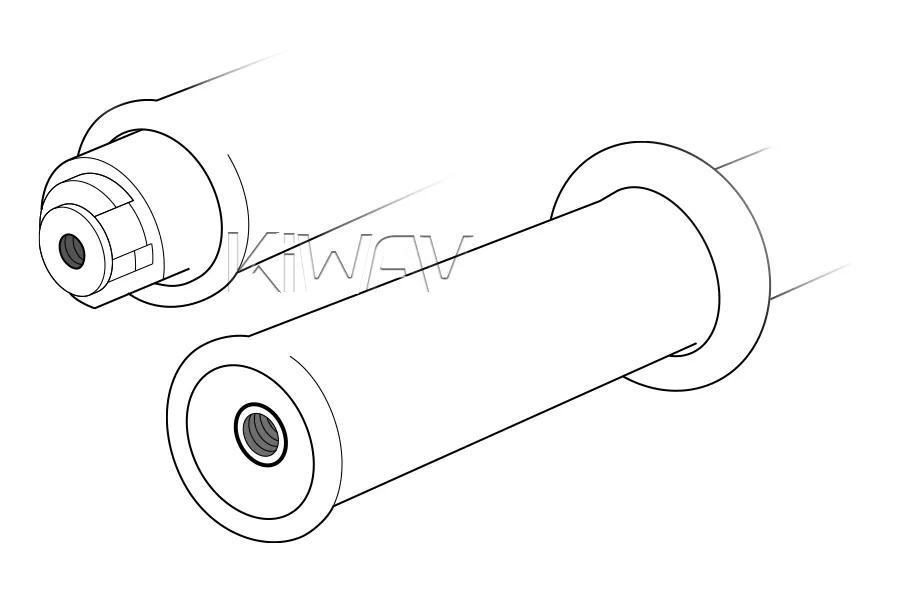
- Best Mounting: Direct Bolt-on. You'll screw a bolt directly into the bar.
- Alternative: Clamp-on, if you have enough usable outer tube space for mirrors.
- Caution: You must match the thread size (Commonly M5, M6 or M8).
- Note on Surface: If the bar-end surface is recessed or protruding (uneven), you must use an adapter/spacer so the mirror base can sit on a perfectly flat surface.
3. Solid Bars
If you see the handlebar is a solid piece of metal with no opening.
- Best Mounting: Clamp-on.
- Alternative: If you want an internal mount, you would need to drill and tap threads or make it a hollow bar yourself.
4. Occupied Internals (Weights or Electronics)
If the bar is occupied by a metal rod (vibration dampener) or the mechanism for an electronic throttle.
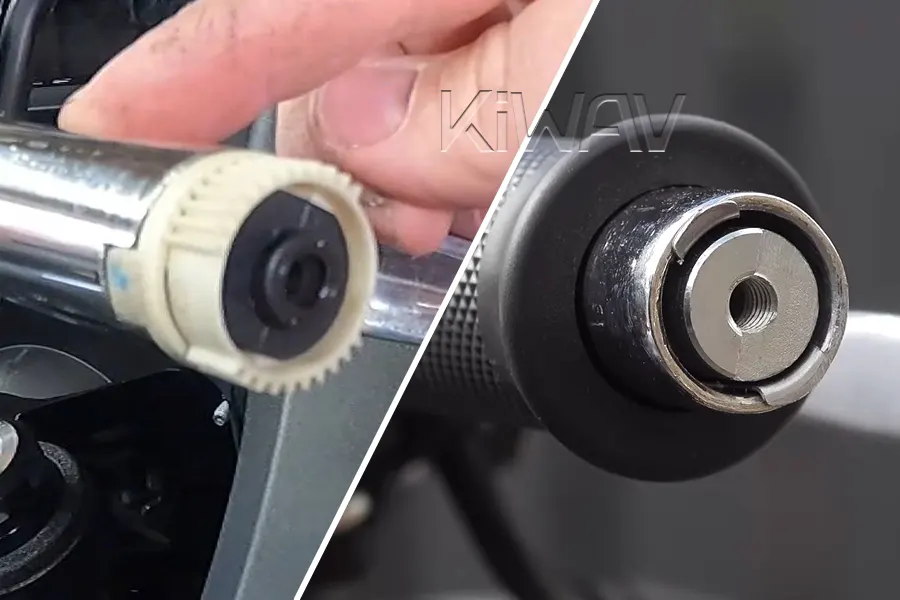
- Best Mounting: Clamp-on only.
- Warning: DO NOT attempt to force expansion bolts into a bar with an electronic throttle (ride-by-wire), as this can jam the throttle and create a serious safety hazard.
Part 1: For Clamp-On Mounting
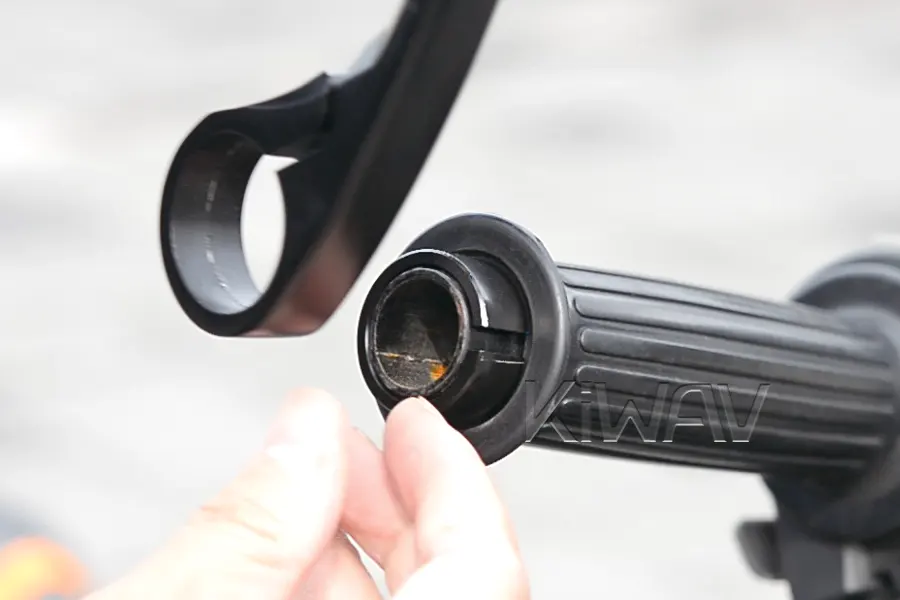
Best for: All bars with enough exposed space at the handlebar ends. This system clamps directly onto the outside of the handlebar tube rather than expanding inside it.
Step 1: Check for Usable Clamp Space
This is the "Hard Requirement" for clamp-on mirrors.
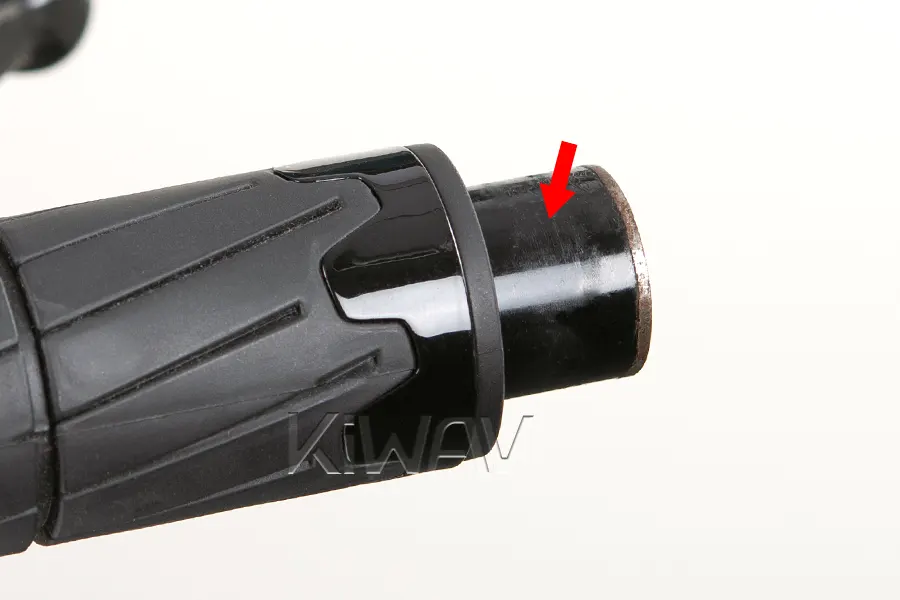
- Requirement: You typically need at least 18mm (depending on the mirror model) of bare handlebar tube exposed to accommodate the clamp.
- How to get it: You may need to slide your grips, throttle housing, and switchgear inward.
Step 2: Measure the Outer Diameter (OD)
This is the "Hard Requirement" for clamp-on mirrors.
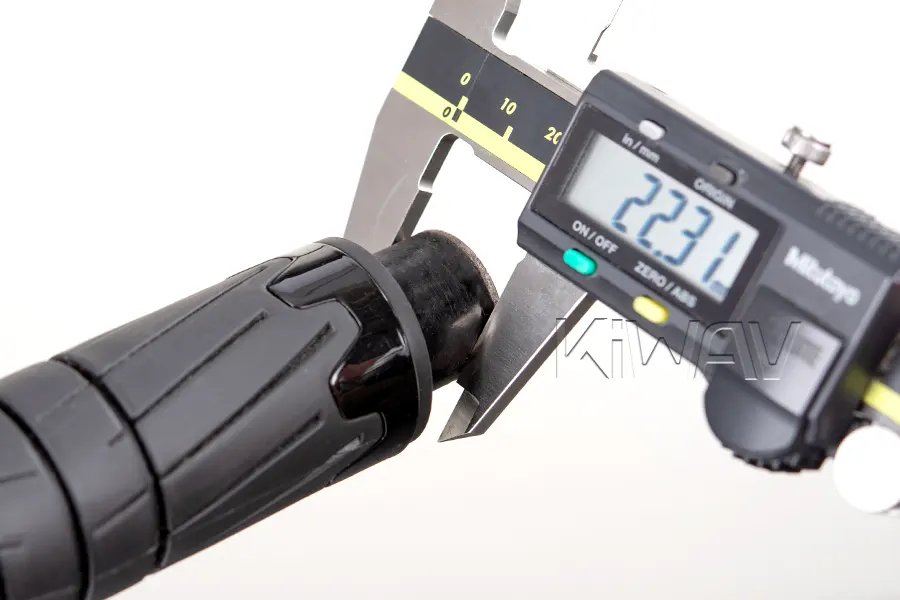
Measure your handlebar at the very tip where the mirror will sit. The clamp must match the thickness of your handlebar perfectly.
- Common Sizes: 22.2mm (7/8") and 25.4mm (1") are the most common.
- Note: If you have "tapered" (Fat bars), the diameter at the ends is usually 7/8”, even if the center is 28mm or larger.
Step 3: Confirm Mirror Compatibility
This is the "Hard Requirement" for clamp-on mirrors.
Check the specifications of the clamp-on mirror you are interested in to see if it fits your measured diameter.
- Check the range: Ensure the mirror's spec sheet explicitly lists your bar's OD as a compatible size.
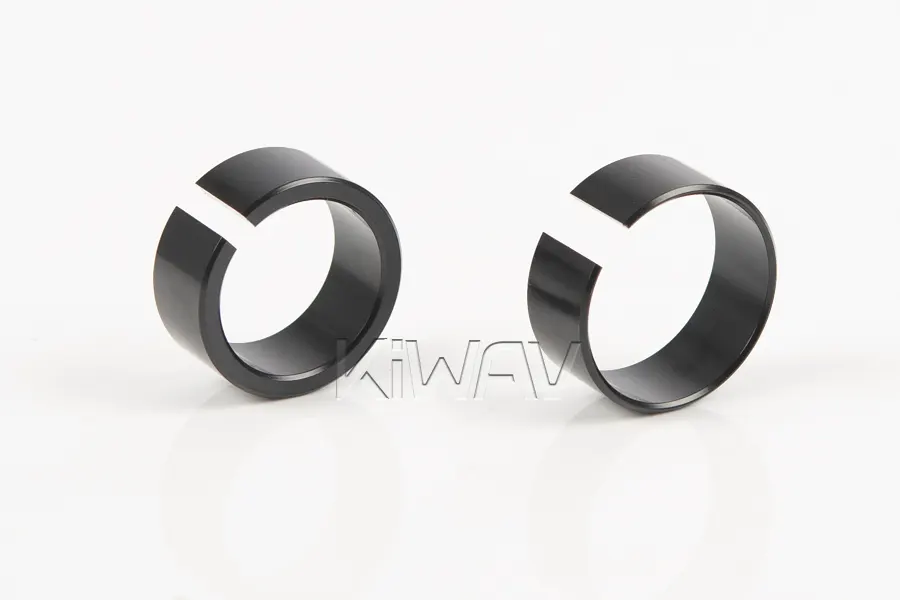
- The universal fit: Most premium clamp-on mirrors (like KiWAV’s) come with adapter rings. These allow the same mirror to fit both 7/8” and 1” handlebars securely.
Looking for the perfect match? → Explore our Bar-End Mirrors for Clamp-on Mounting
Part 2: For Expansion Component Systems
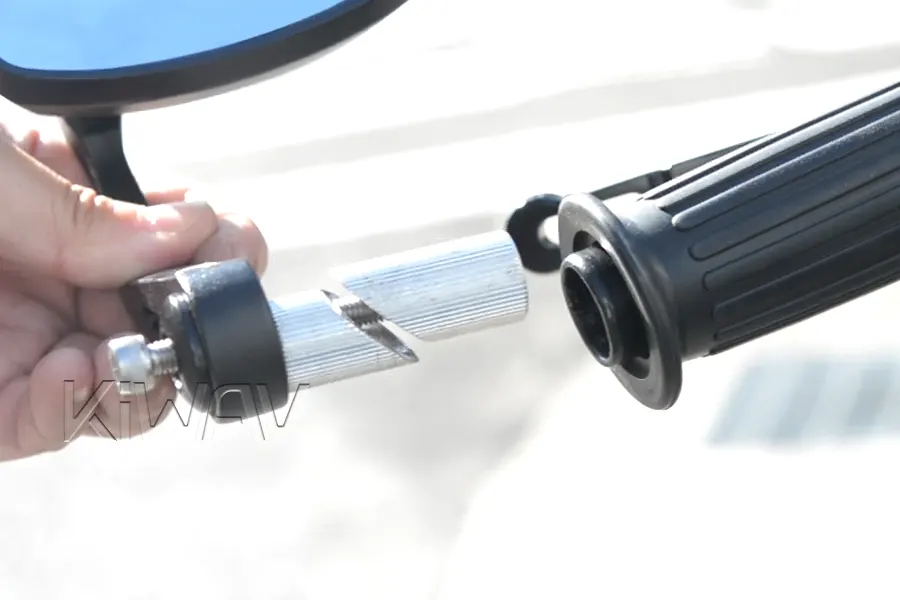
Best & Only for: Hollow bars. This system uses an internal wedge or sleeve that expands against the inner walls of the handlebar to create a secure friction fit.
Looking for the perfect match? → Explore our Bar-End Mirrors for Hollow Handlebars
Step 1: Measure the Internal Diameter (ID)
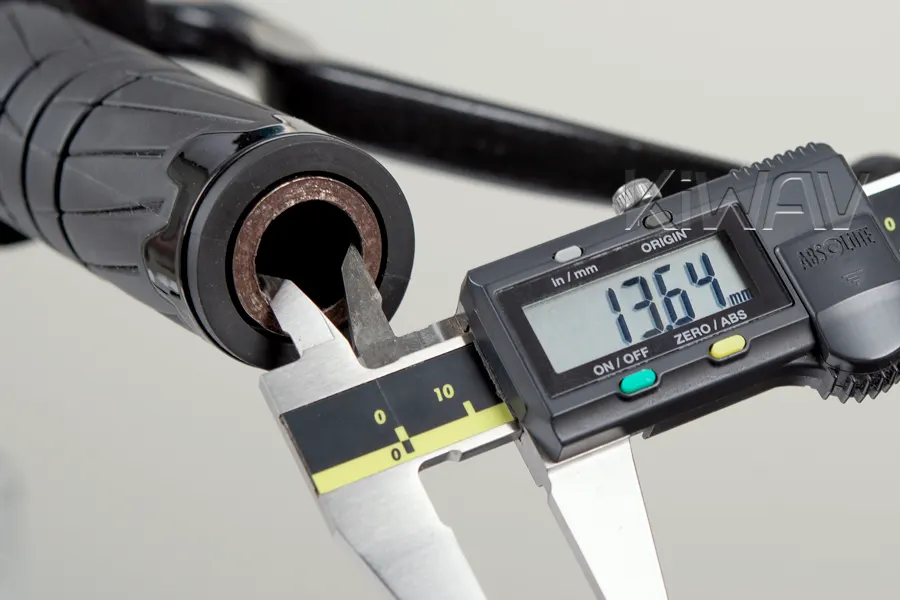
Since the expansion sleeve must fit snugly inside the bar before tightening, precision is key.
How to measure: Use a caliper for the most accurate reading. Measure both the vertical and horizontal diameter of the opening, as tubes are not always perfectly round.
Common Sizes:
- 13mm – 14.5mm: Common for thick-walled aluminum bars and tapered "Fat" bars.
- 15mm – 16.5mm: Occasional range for thin-walled aluminum bars or reinforced steel bars.
- 17mm – 19mm: Standard for most 7/8" steel handlebars.
- 19mm – 22mm: Standard for most 1" and 1-1/4” handlebars.
Step 2: Check for Internal Obstructions
Even if the opening is hollow, there might be obstacles further inside.
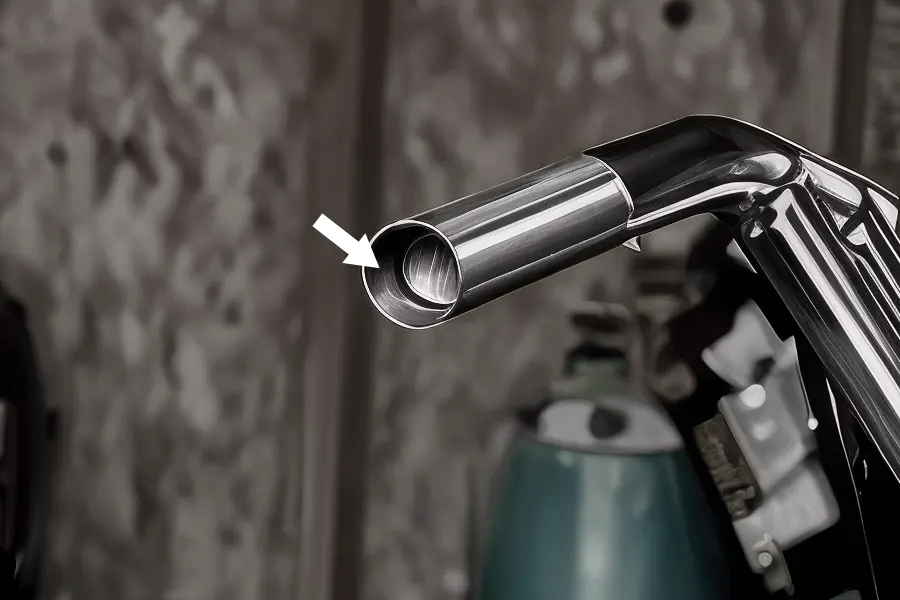
- Depth check: Insert a thin screwdriver or a hex key into the bar to see how far the "hollow" section goes. You need at least 35mm–50mm of clear depth for the expansion bolt to sit fully flush.
- The "internal step”: Some bars have a narrowed section (a "step") about 2 inches in. If the expansion sleeve hits this step, the mirror will stick out.
Step 3: Confirm Mirror Compatibility
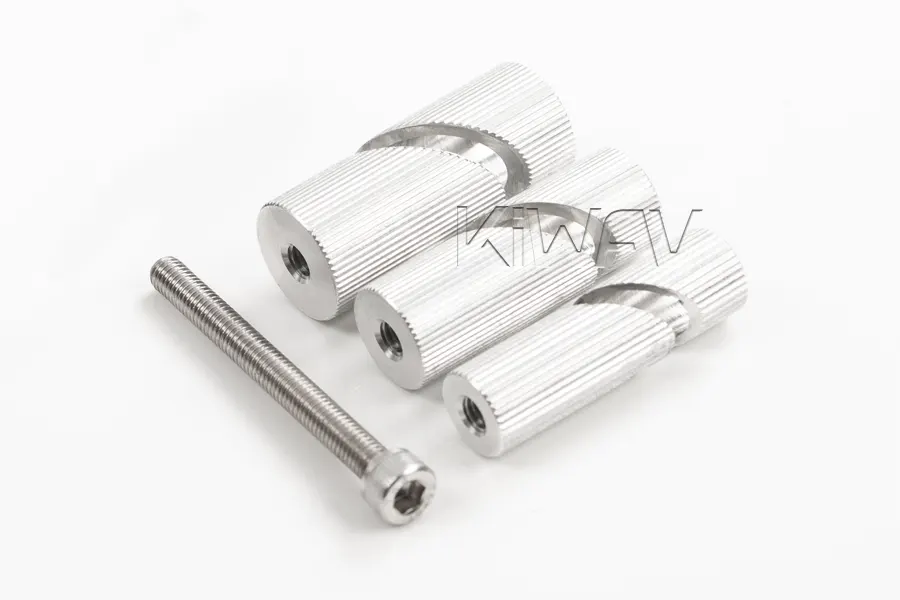
Check the specifications of the bar-end mirror you are interested in.
If your handlebar's ID falls within the compatible range explicitly listed in the mirror's spec sheet, you are good to go!
If you are looking at a detailed size spec instead of just a general fitment range, remember: "Just fitting" is not enough.
Even if an expansion sleeve (e.g., 14mm) can technically slide into a handlebar (14.1mm), it doesn't mean it will be secure.
- The Need for Expansion Room: Expansion bolts work like an anchor. They require a specific amount of "travel" to flare out and create enough clamping force against the inner walls.
- Minimum Fitment Threshold: Always ensure your handlebar's internal diameter is at least 0.5mm larger than the sleeve's starting diameter for a safe and rock-solid installation. This ensures that the sleeve has enough room to fully expand and "bite" into the metal.
- Risk of an Overly Tight Fit: If the gap is too small (e.g., only 0.1mm), the bolt may bottom out before the sleeve has properly expanded. This results in a loose accessory that can rotate or vibrate off while riding.
Part 3: For Threaded Mounting (Direct Bolt-on)
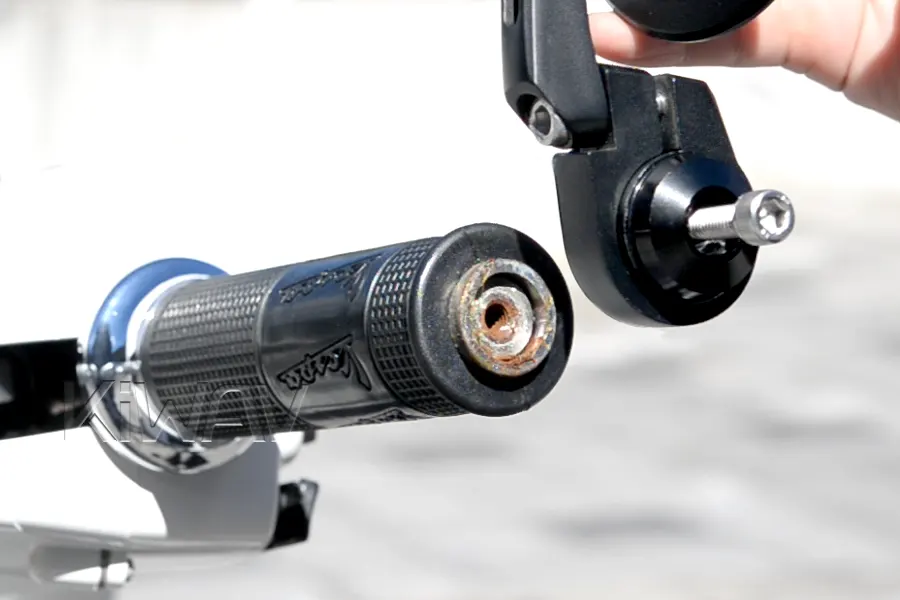
Best for: Threaded bars. This is the most secure mounting method as it utilizes the bike's factory-machined threads.
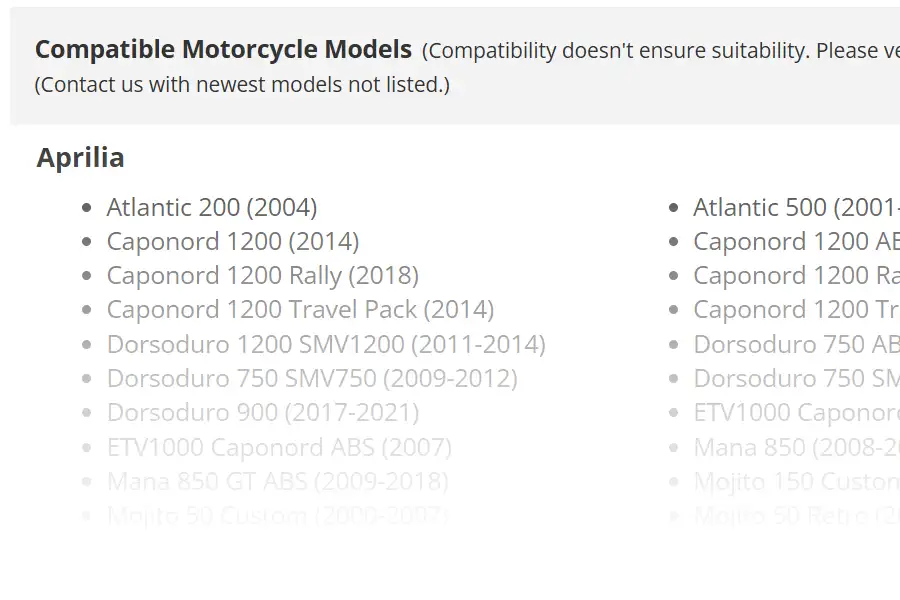
In this case, you can simply check the mirror's motorcycle model compatibility list to see where your bike lands. This is the easiest path, as it saves you the trouble of measuring the threads yourself.
Step 1: Identify the Thread Size & Depth
To bolt on a bar-end mirror, you must match the internal thread of the handlebar.
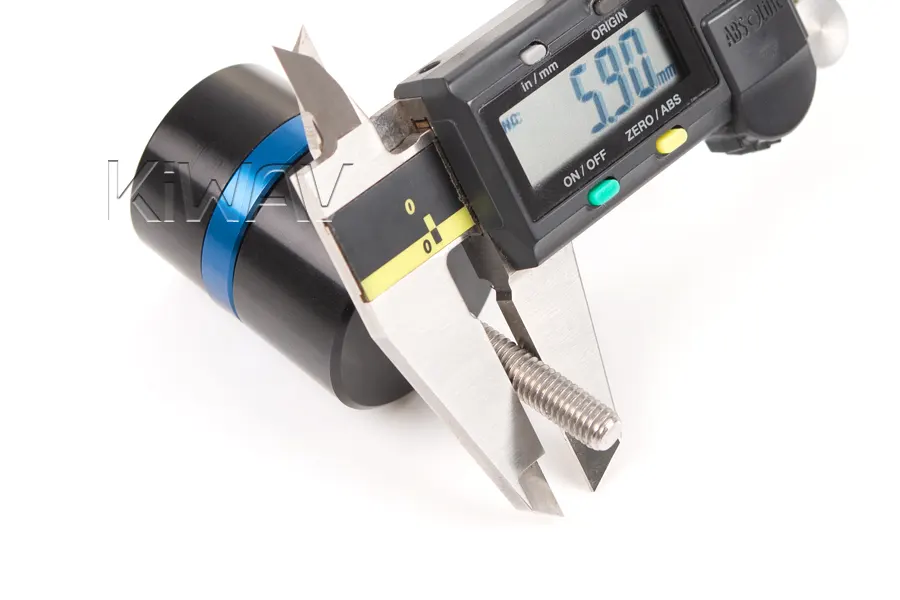
- How to measure: If you still have a bar-end weight/cap on your bike, simply measure the bolt that holds it in place to identify the thread size. (*Note: Most motorcycles use M5, M6, or M8 internal threads).
- Checking depth: You can check the available thread depth by inserting a thin stick into the threaded hole.
Step 2: Check the Mounting Surface
Bar-end mirrors need a flat surface to sit against. Look closely at the area between the threaded hole and the edge of the bar:
Enough Flat Surface (Bolt-On Ready)
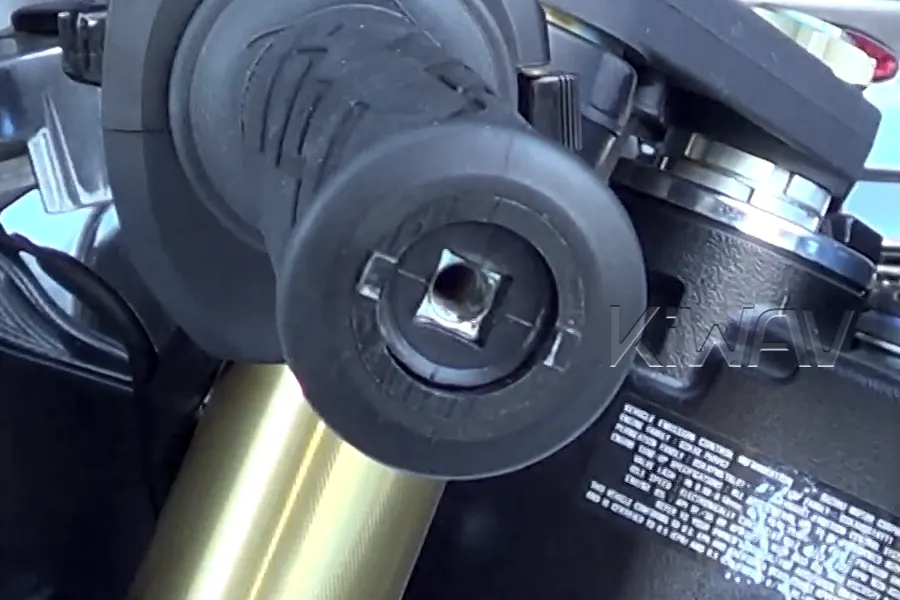
Ensure the surface is flat and clear. For a rock-solid fit, at least 50% of the bar-end surface must contact the mirror base. If the mirror base can sit squarely against a flat seat, it will bolt on securely without wobbling.
Uneven Surface (Adapter Required)
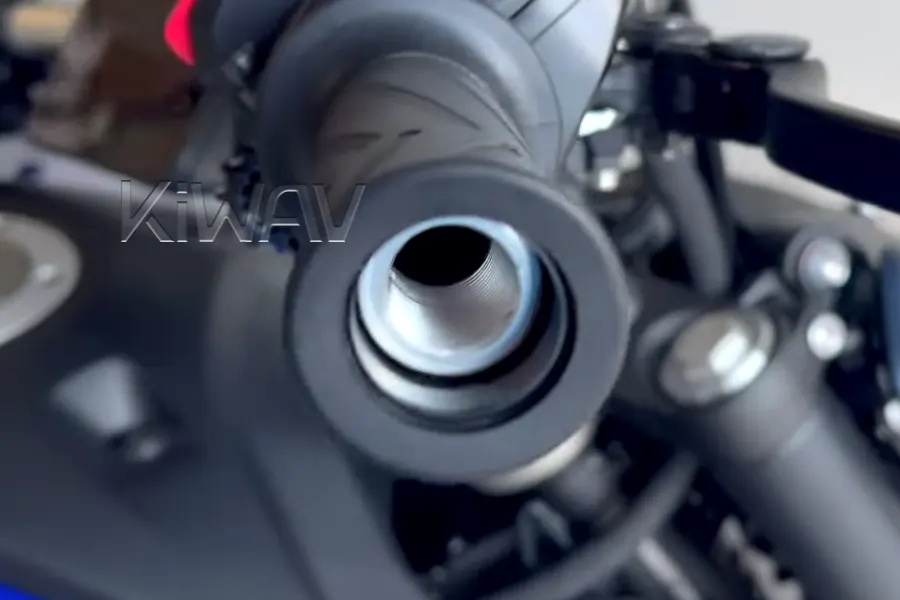
If the bar end has a "stepped" profile or if the threaded hole is recessed so deep that the bolt cannot reach it securely, you will need a model-specific adapter or spacer to bridge the gap for a secure bolt-on installation.
Step 3: Confirm Mirror Compatibility
To bolt on a bar-end mirror, you must match the internal thread of the handlebar.
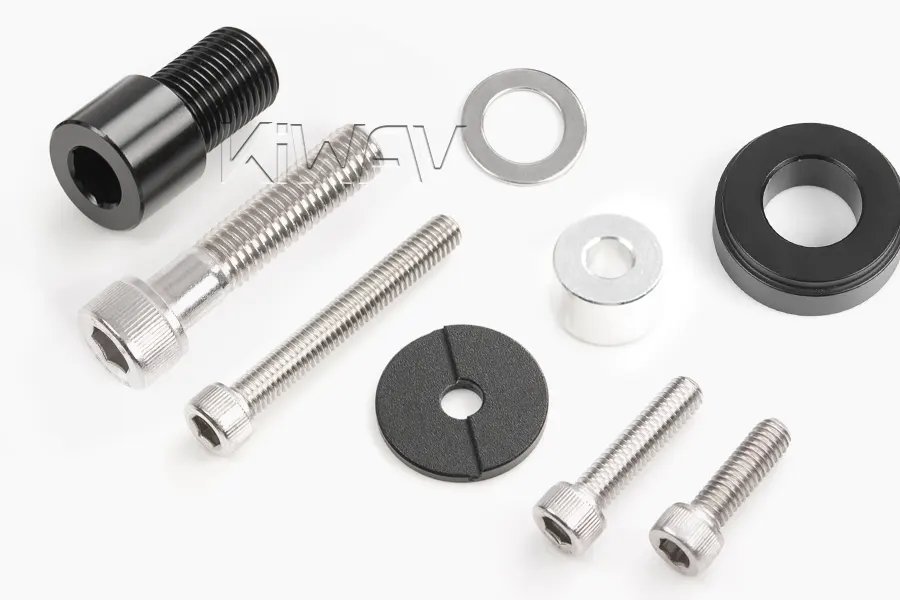
Ensure the mirror includes the specific bolt size and adapters (if needed) that you identified in the previous steps.
Also, the bolt provided with the mirror (or the one you purchase separately) should be long enough to engage at least 10mm–12mm of thread, but not longer than your measured thread depth to ensure it doesn't bottom out before the mirror is tight.
If everything matches, you are good to go!
Real-world example: see how a shorter M6 × 20 mm bolt fixed a loose bar-end mirror on a 2019 Triumph Street Scrambler when the original bolt bottomed out.
Looking for the perfect match? → Explore our Explore our Bar-End Mirrors for Direct Bolt-On
Common Bar-End Mirror Fitment Challenges
Before ordering, take a moment to check these three common areas where fitment often gets tricky. Identifying these now will save you from returns later.
1. Throttle Safety
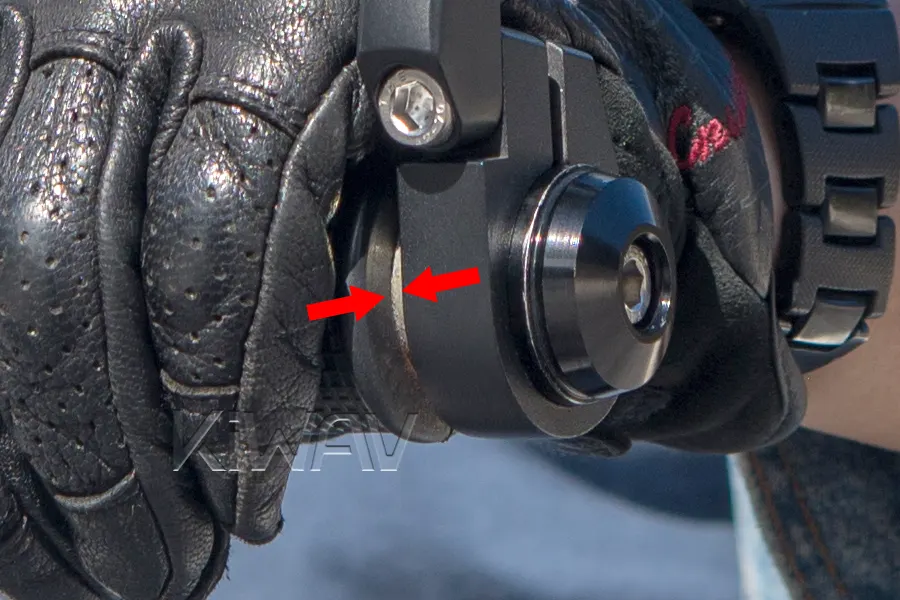
For a safe installation, there must be a small gap between the mirror base and your throttle grip.
- The Check: Look at your bar end. Is your throttle grip flush with the very edge of the handlebar?
- Potential Issue: If there's no room to spare, the mirror might pinch the throttle, preventing it from snapping back.
- The Pre-buy Fix: If your grips are long, you may need to plan to slightly shift your hand controls inward to create space.
2. Full Lock Clearance
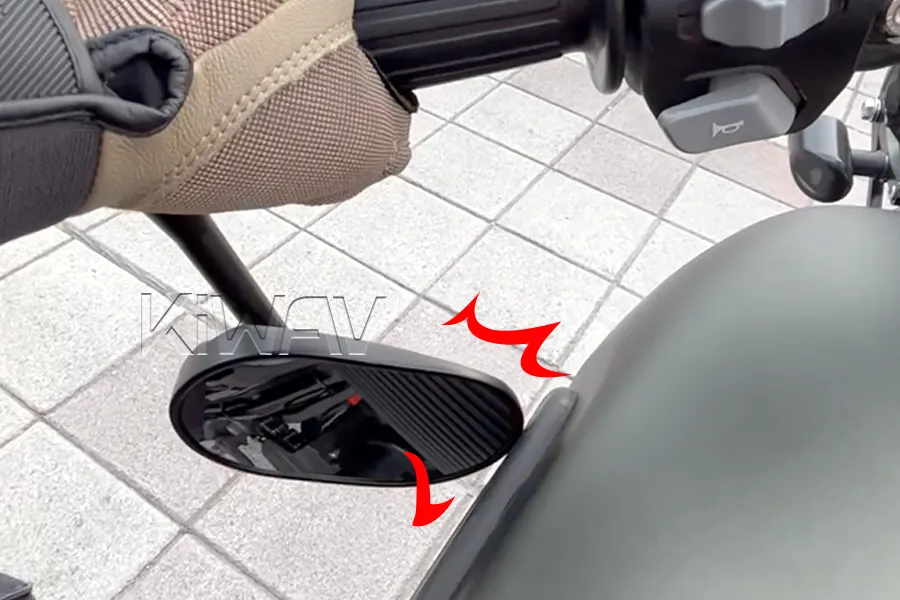
Because bar-end mirrors extend outward or tuck inward, they can sometimes interfere with other parts of the bike at "full lock" (when the bars are turned all the way left or right).
- The Check: Sit on your bike and turn the handlebars fully to both sides.
- Potential Issue: Check if a mirror mounted at the end of the bar would hit your front fairing, windshield, or fuel tank. Also, ensure your brake and clutch levers have enough travel without hitting where the mirror arm would sit.
- The Pre-buy Fix: If space is tight, consider a highly adjustable-arm mirror or a more compact-shape mirror to maximize clearance.
3. Your Hand Movement & Ergonomics
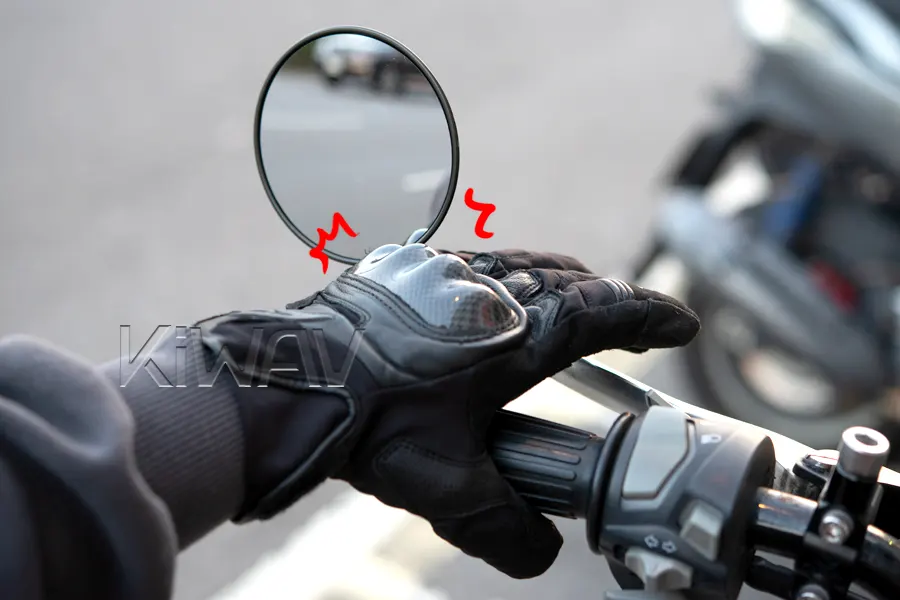
Everyone's hands are different, and your gear choice—like thick winter gloves—can affect how much space you need on the grips.
- The Check: Consider the mirror’s arm length and shape. Will it leave enough room for your hand to move freely?
- Potential Issue: If the mirror arm is not angled outward or the length is too short, it might cramp your hand or interfere with your ability to quickly reach the brake or clutch levers.
- The Pre-buy Solution: If you find it difficult to visualize the clearance, most KiWAV motorcycle mirrors include a downloadable 1:1 actual-size template on the product page. You can print it out and hold it up to your bike to physically confirm the clearance and ergonomics before you buy.
Frequently Asked Questions
Q: Can I use bar-end mirrors if I have heated grips?
A: It depends on your specific setup. You can install bar-end mirrors only if there is sufficient space and a proper mounting point that does not interfere with the heated grip's internal heating elements, wiring, or rotation mechanism.
- For Threaded Bars: If your heated grips are designed to work with factory bar-end weights, you can usually swap them for mirrors using the same mounting hole.
- For Hollow Bars: Use extreme caution. Ensure that inserting an expansion sleeve won't pinch or damage the wiring inside the bar.
- For Clamp-on Mounting: Not recommended. Most clamp-on mirrors require a specific amount of "exposed" handlebar or a dedicated adapter. If you clamp directly over the outer casing of a heated grip, you risk crushing the internal heating circuits or causing the throttle to stick.
Important: If the installation requires modifying or cutting into the heated grip structure, we do not recommend installing bar-end mirrors, as this could lead to electrical failure or safety issues.
Q: Will bar-end mirrors increase vibration?
Actually, it’s often the opposite. High-quality bar-end mirrors are designed with specific weights to act as vibration dampeners. However, because they sit at the very end of the bar, any existing vibration may be more visible in the glass. For the smoothest view, ensure your mounting bolts are tight and consider using weighted bar-end adapters.
Q: My handlebar has an internal weight, but it rotates freely. Can I still use a threaded mount?
No. If the internal weight rotates, a mirror bolted directly into it will not stay fixed in place. In this case, we highly recommend using a clamp-on mounting method.
If you prefer an expansion-style mount, you will need to remove the internal weight/plug entirely to clear the handlebar's interior. Once the bar is hollow and clear, you can then follow our [Part 2: For Expansion Component Systems] guide.
Q: Are bar-end mirrors legal to use on the road?
Regulations vary by region. Generally, most bar-end mirrors are legal as long as they provide a clear view of the road behind you and meet the minimum surface area requirements.
Many KiWAV mirrors are E-mark certified, meaning they meet strict European safety standards. Always check your local vehicle equipment regulations to ensure compliance.
Q: Can I mount bar-end mirrors "upside down" (hanging below the bars)?
Of course, most of our mirrors can be mounted either way. Under-bar mounting offers a cleaner, low-profile look but may require more "eye movement" to check your surroundings.
Before you commit, check your tank clearance at full lock to ensure the mirrors don't hit your fuel tank or your knees when turning.
Conclusion: Choose with Confidence
Finding the perfect fit for bar-end mirrors doesn’t have to be a guessing game. By identifying your handlebar type, measuring your threads, and checking for clearance, you ensure not only a cleaner look for your bike but a safer, more stable ride.
At KiWAV, we are committed to helping you get it right the first time. Whether you need a direct bolt-on solution, a specialized adapter, or a universal expansion kit, our mirrors are designed with precision and rider experience in mind.
Ready to Upgrade?
- Explore our Collection: Browse our full range of [Bar-End Mirrors] or check our [Smart Motorcycle Mirror Advisor] and find the style that matches your ride.
- Still Unsure? If you have a unique handlebar setup or a rare bike model, don’t hesitate to contact us. Send us clear photos of your bar ends along with the measurements you identified in this guide. Our support team will analyze your data to recommend the perfect mounting solution.
Further Reading
From here, you can explore: