



So you've confirmed that your bike uses Handlebar Mirrors.
Now the goal is simple: to help you know how to choose a handlebar mirror that matches your thread type and fits securely in the correct final position without interference.
Whether your motorcycle uses a Perch-Mount (threaded socket) or a Bolt-Through (smooth bore) setup, this guide walks you through the exact checks needed before buying.
Not sure what setup you have? Looking for mirrors other than handlebar mirrors? Check out this guide first→ Motorcycle Mirror Fitment Guide: Will These Mirrors Fit My Bike?
Quick Answer: How to Check Handlebar Mirror Fitment?
- Perch-mount: Check thread diameter, pitch, depth, and left/right thread orientation.
- Bolt-through: Check perch thickness, stud length, and nut access underneath.
- Always verify reservoir clearance, lever access, and full-lock clearance
Part 1: For Perch-Mount (Threaded) Setups
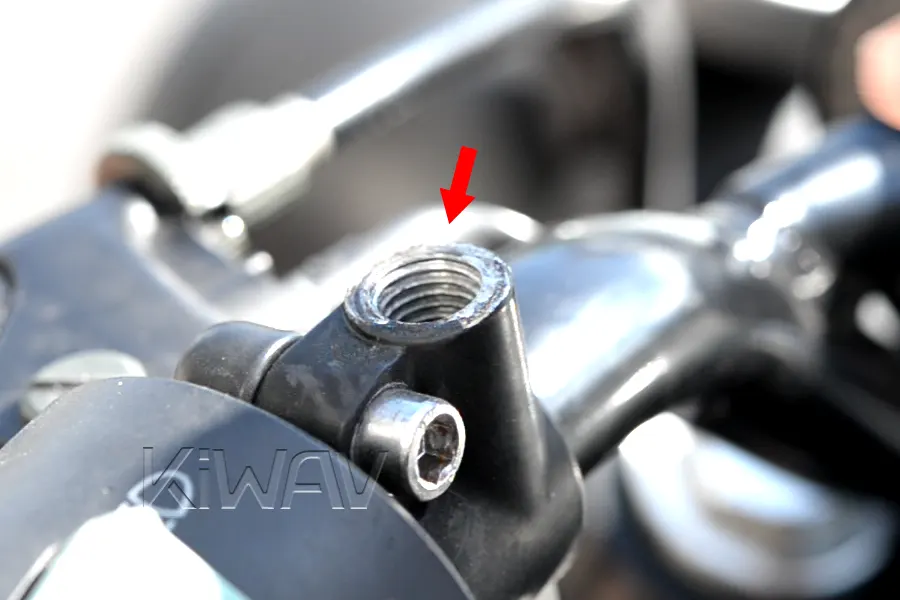
Most Japanese and European bikes have a threaded socket integrated into the brake and clutch perches.
If this is your setup, there are three things you need to do:
- Identify the thread
- Determine whether an adapter is required
- Check the clearance around controls
Step 1: Identify the Thread (Size & Direction)
Thread compatibility is determined by diameter, pitch, and thread direction. Don't let the technical terms scare you. We're just looking for the size of the threaded hole and which way it turns.
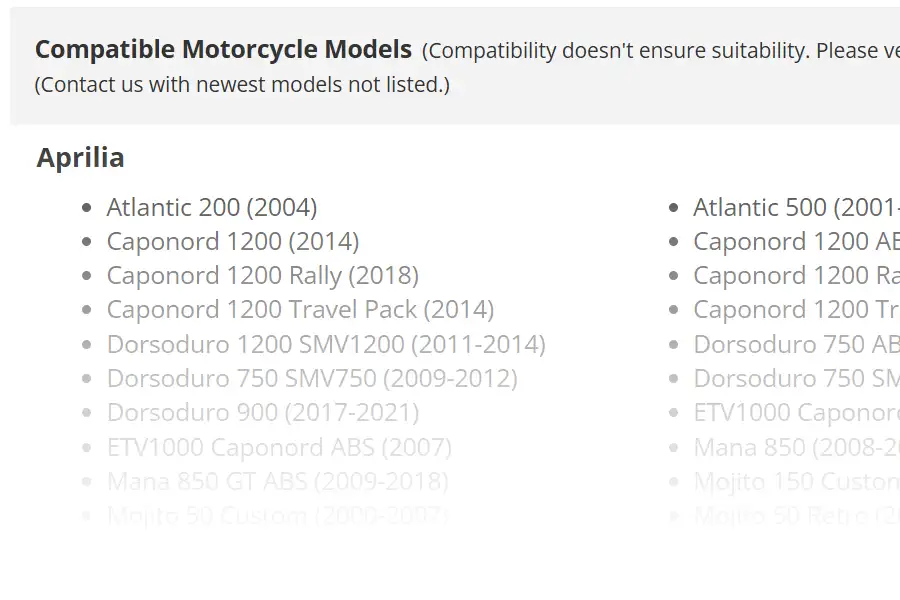
In this case, you can simply check the mirror's motorcycle model compatibility list to see where your bike lands. Alternatively, you can look up the factory specifications (SPECS) of your bike's stock mirrors to see exactly what fits. This is the easiest path, as it saves you the trouble of measuring the threads yourself.
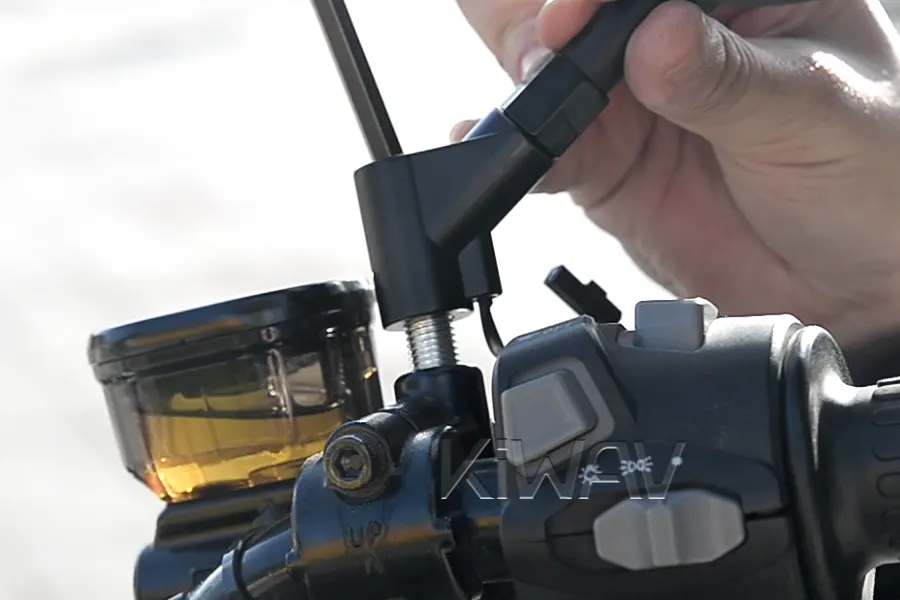
Removing your existing mirror is an easy way to inspect the thread. If no mirror is currently installed, you can use a bolt of a known size and see if it threads in easily.
Caution: Do NOT force a bolt into the perch. If it doesn't turn smoothly by hand, it may be the wrong size or pitch, and forcing it can permanently damage the threads.
1. Measure Diameter
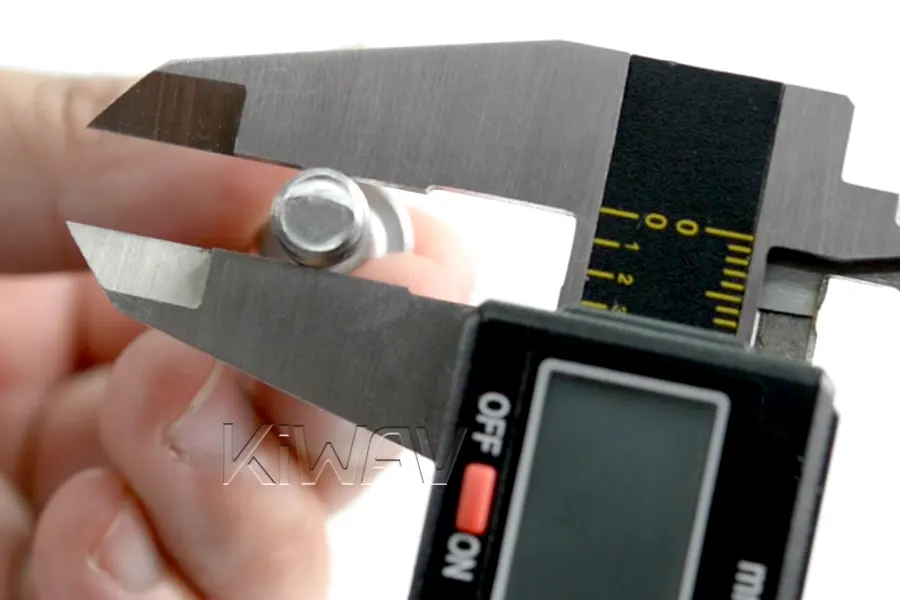
Use a caliper or a ruler to measure your existing mirror bolt or the opening of the threaded hole.
- 9.6mm — 10mm: You have an M10 (10mm) socket. (Most common for bikes over 250cc).
- 7.6mm — 8mm: You have an M8 (8mm) socket. (Common on scooters and small-displacement bikes).
- Imperial Sizes (e.g., 5/16"):
While many American brands traditionally use Imperial (inch) hardware, this is no longer a fixed rule. For example, the Harley Street 500 / 750 uses a 5/16" bolt, but newer models (like the Pan America or Sportster S) have shifted to M10 metric threads. Always measure to be sure.
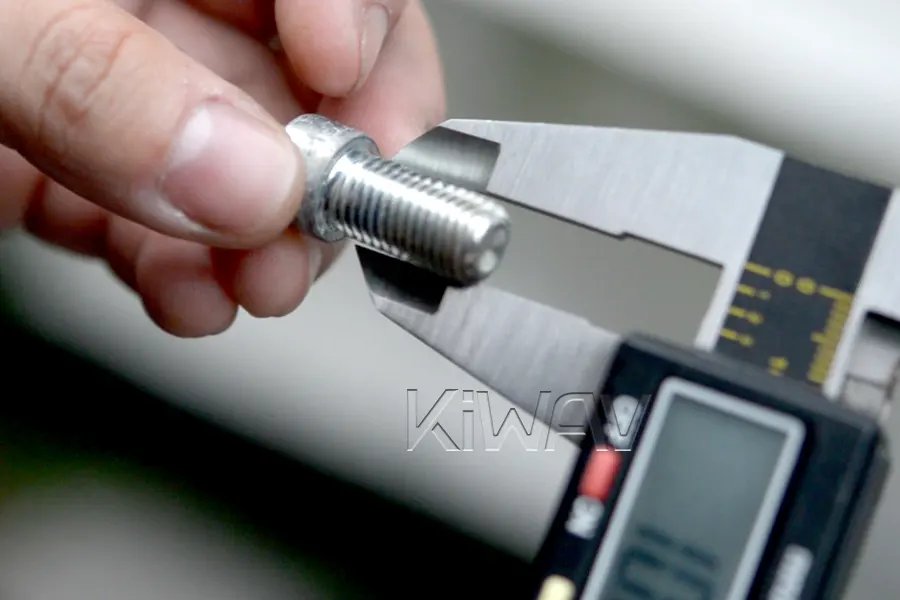
If using a caliper, set it to a fixed size (e.g., 8.00mm) and try to slide the bolt through the gap. If it passes through with a snug fit, it's an M8. If the bolt is too large to fit, increase the setting to the next size (e.g., 10.00mm) and try again. Always start from the smaller size and work your way up to ensure an accurate reading.
2. Measure Pitch
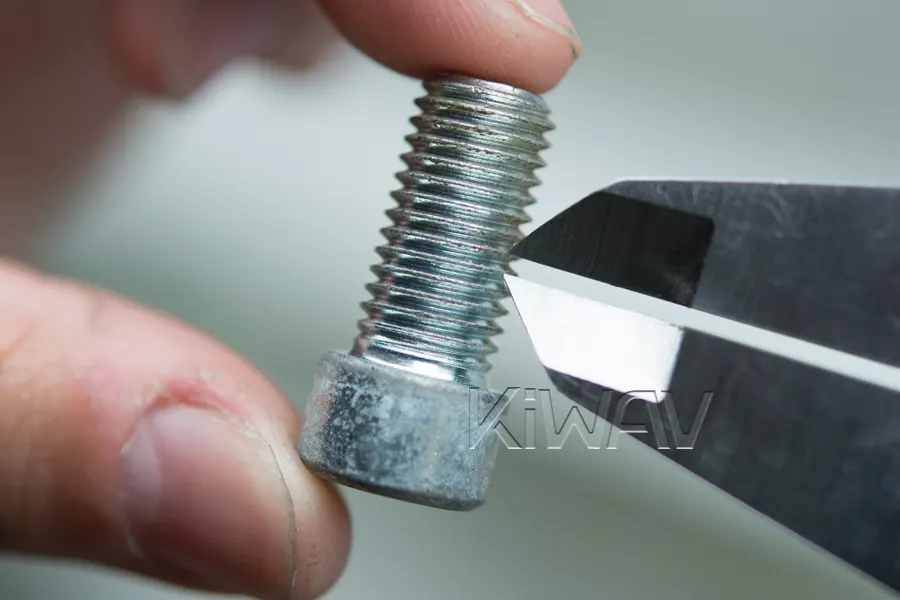
While a thread gauge is the most precise tool, you can also estimate the pitch using a ruler or caliper.
- 1.25mm distance: This is the most common pitch for most motorcycles.
- 1.5mm distance: Common on BMW and some European brands.
- 1.0mm distance: Rare, but sometimes found on specialized high-performance brake master cylinders (like certain Brembo models).
- Imperial Thread Pitch (e.g., 24 TPI): Found on bikes using imperial hardware measured in Threads Per Inch (TPI) like the Harley Street 500/750.
3. Measure Depth
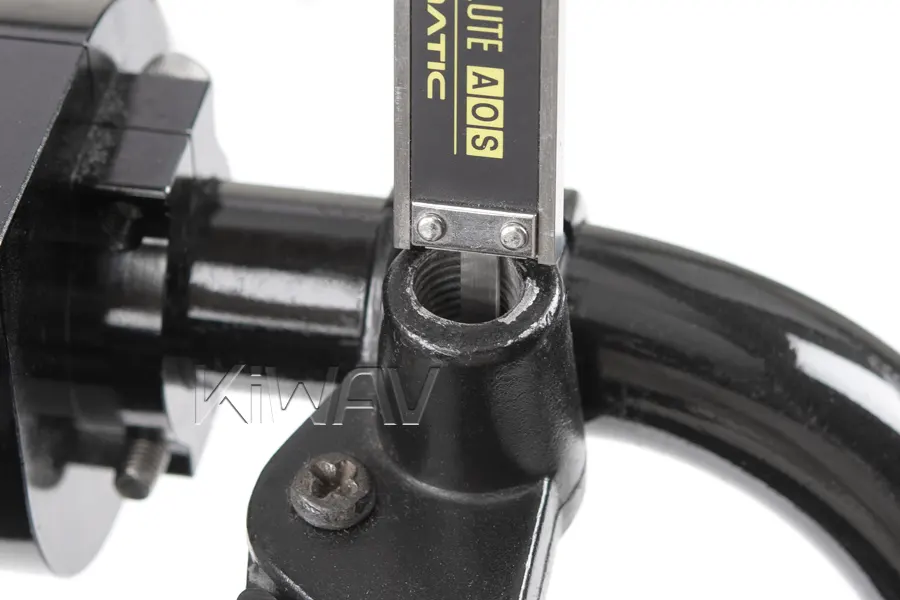
Measure how deep the threaded hole (socket) goes before it bottoms out.
- The Risk: Even if the width and pitch match, if the mirror's bolt is longer than the hole's depth, the bolt will "bottom out" before the mirror is tight. This leaves the mirror loose and vibrating.
- The Fix: Compare your perch depth with the exposed thread length of the mirror you are buying. If the bolt is too long, you will need to add some spacers or washers, or switch to a shorter bolt.
4. Check Orientation
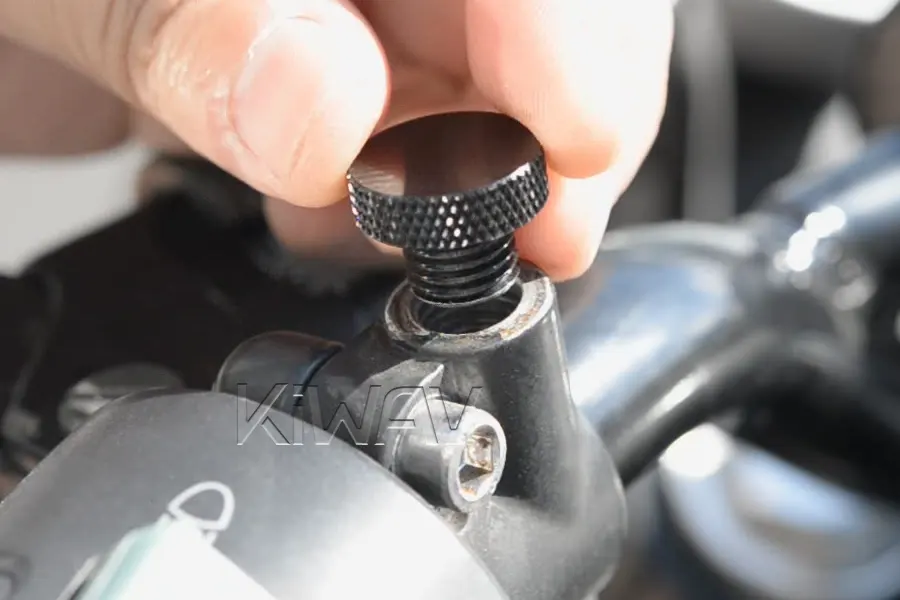
Check which direction you need to turn the bolt to screw it into the perch.
- Standard Thread: Turns clockwise to tighten.
- Reverse Thread: Turns counter-clockwise to tighten.
- Check Both Sides: Many bikes (especially Yamaha) use a standard thread on the left but a reverse thread on the right.
- If it tends to climb out, it is a standard thread
- If it tends to sink inward, it is a reverse thread
Step 2: Determine Whether an Adapter Is Required
Once you know your bike's thread size and direction, you need to compare it with the mirror's default bolt. Most aftermarket mirrors are designed to be universal, but that doesn't always mean "direct bolt-on."
1. Check for "Direct Bolt-on"
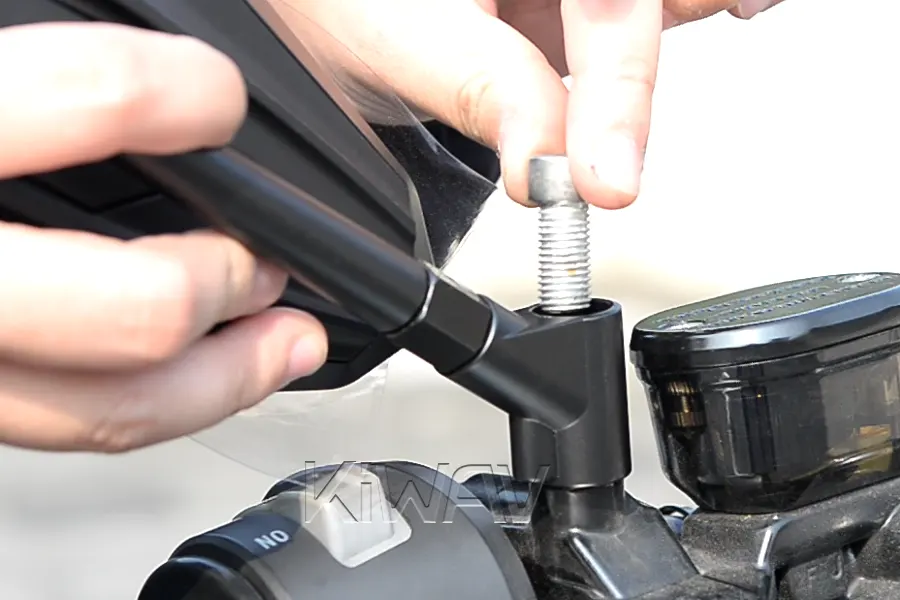
Does the mirror come with a bolt that matches your bike's perch exactly?
Example: If your bike is M10 1.25 pitch standard thread and the mirror comes with an M10 1.25 pitch standard bolt, you are ready to go.
2. Check the Included Adapters
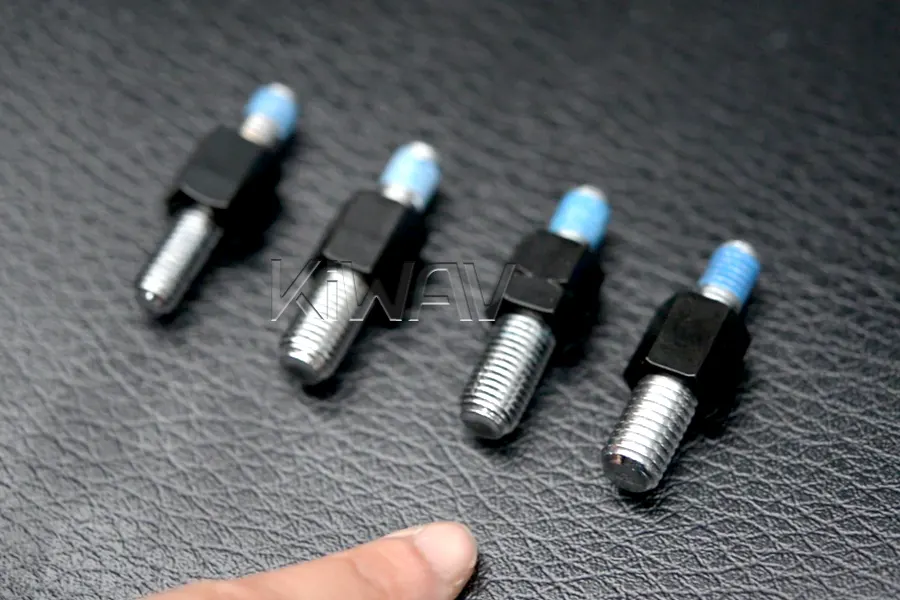
Many high-quality mirrors include a set of adapters (e.g., M10 to M8, or standard to reverse) in the box.
The Goal: Ensure the package includes the specific adapter that bridges the gap between the mirror's stem and your bike's perch.
3. Consider the "Adapter Look"
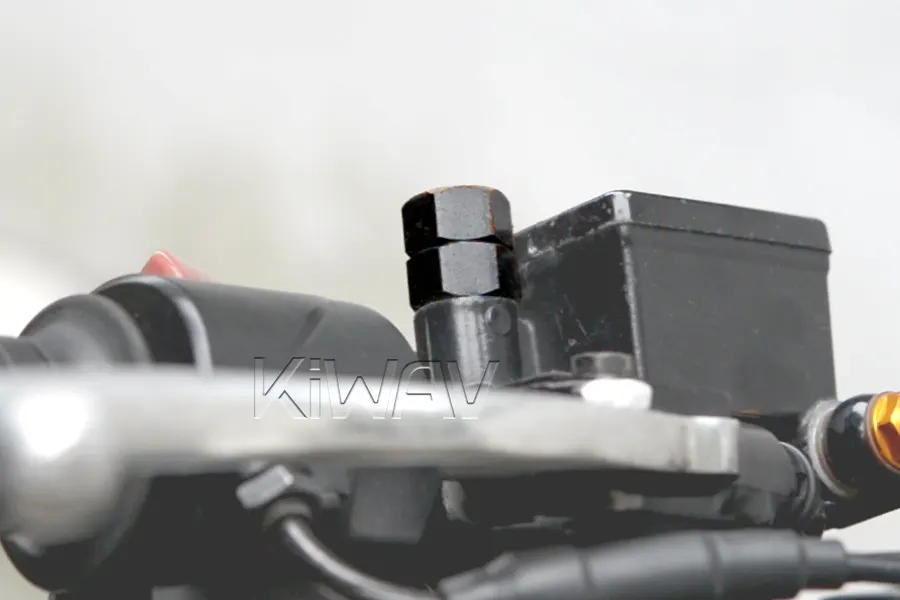
This is a detail many riders overlook. An adapter acts as an extension, which means:
- Added Height: The mirror will usually sit about 10mm–20mm higher than it would without an adapter.
- Visual Profile: Some adapters look like a seamless part of the stem, while others might look like a "stack" of hardware.
Step 3: Check the Clearance
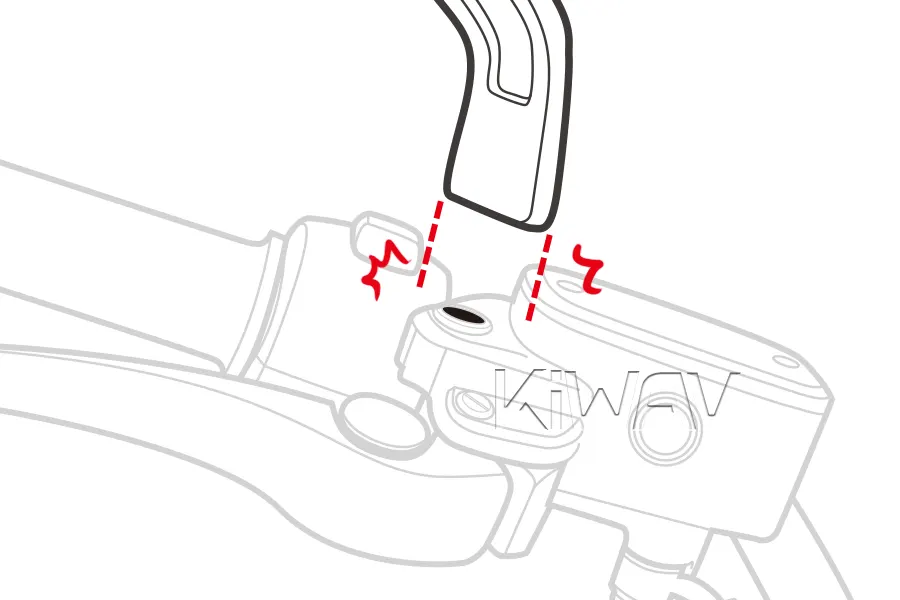
Last but not least, the final essential step is to ensure the mirror's physical presence doesn't interfere with your bike's operation or other accessories. Before finalizing your purchase, you need to visualize how the mirror sits on your bike.
How to verify fitment:
- Review Technical Diagrams: Most mirrors sold online include a dimensional diagram on the product page. Use these dimensions to estimate the height and reach of the mirror.
- Use Physical Templates: If you find it difficult to visualize, most KiWAV motorcycle mirrors include a downloadable 1:1 actual-size template on the product page. You can print it out and hold it up to your bike to physically confirm the clearance before you buy.
Once you have your measurements or paper cutout ready, check these three critical areas:
- Reservoir Clearance: For bikes with large hydraulic fluid reservoirs (common on the brake side), make sure the mirror base and mirror stem have enough "rise" or "offset" to clear the reservoir body.
- Lever & Switch Access: Ensure the mirror base doesn't block your fingers from reaching the brake/clutch levers or any switchgear (like your turn signal, horn, or starter button).
- Handlebar Full Lock: Turn your handlebars all the way to the left and right. Check if the mirror stem or glass will hit your windscreen, fairing, or tank bag at these extreme angles.
Part 2: For Bolt-Through (Smooth Bore) Setups
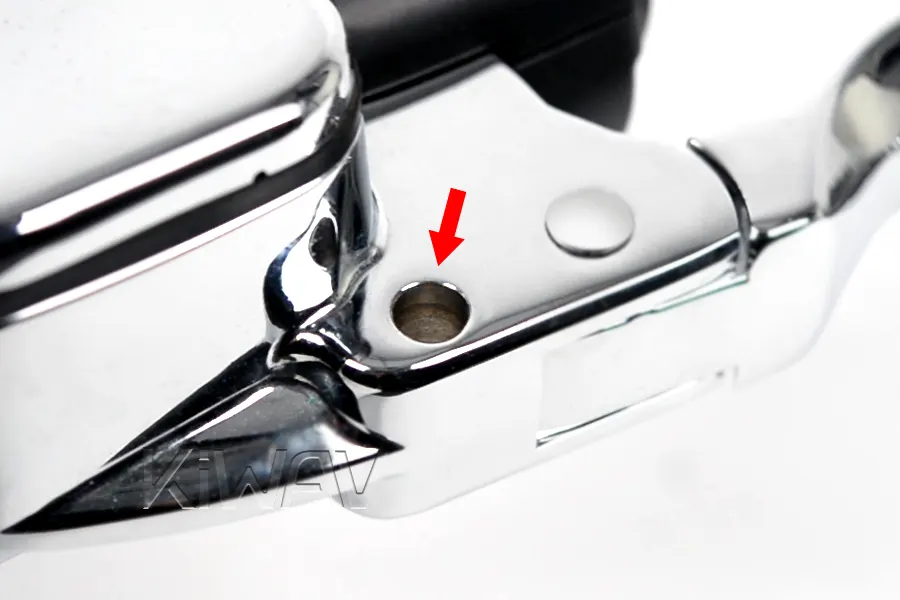
Commonly found on Harley-Davidsons and various cruisers, this setup features a smooth, unthreaded hole in the hand controls. Since the stud passes straight through the perch and tightens with a nut underneath, thread direction is irrelevant.
If this is your setup, you're in luck—there is only one key area to measure:
Step 1: Measure Hole Depth (The "Reach")
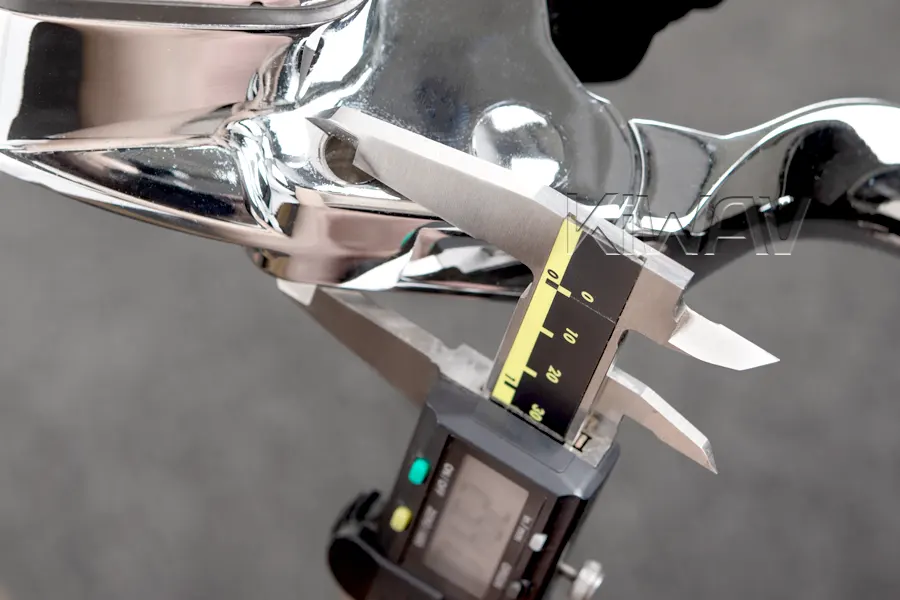
This is where most fitment issues occur. If the stud is too short, you won't have enough thread to engage the nut. If it's too long, you might fail to fasten it securely or the stud may interfere with your turn signals.
*Some perches use stepped or layered housings, so always measure the full effective thickness, not just the visible top section.
- The Measurement: Use a ruler or caliper to measure the total vertical thickness of the mounting perch (from the top surface where the mirror sits to the bottom exit where the nut will be).
- The Fitment: To ensure a secure fit, the mirror's mounting stud must be at least 10mm to 15mm longer than your perch thickness. This extra length is required to accommodate the washer and the mounting nut.
Step 2: Check the Hole
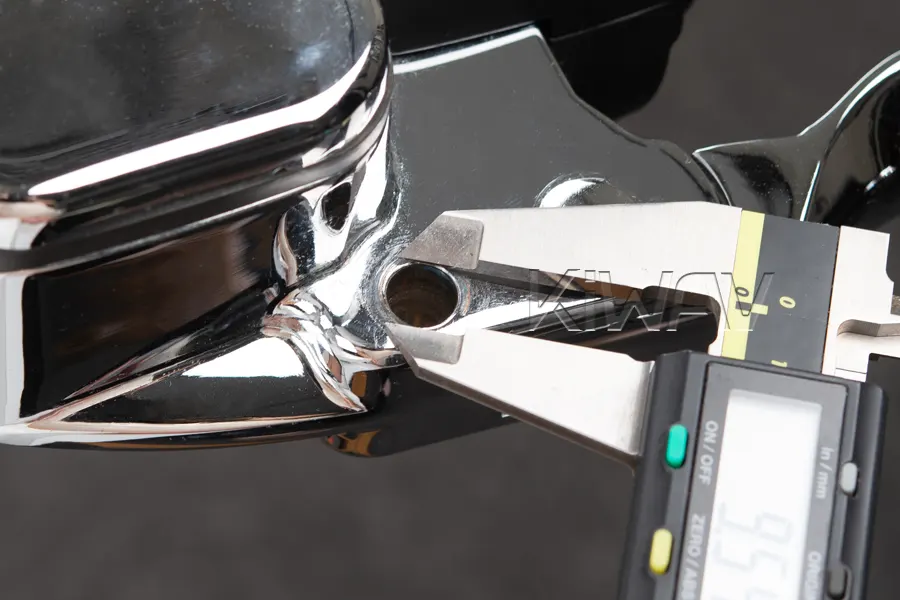
- The Hole Width:
Most bolt-through perches are designed for a standard 5/16" or 8mm mirror stud. Since these sizes are very common, you will rarely run into fitment issues here. A quick check with a caliper or a test with a 5/16” or 8mm bolt will confirm the opening is standard. - The Hole Width:
heck if the mounting surface is flat or has "steps" (recesses) around it. If your perch has steps, depending on the base shape of your new mirror, you may need to add enough spacers or washers to create a flush mounting surface, preventing the mirror from loosening or vibrating.
Step 3: Check the Clearance
Last but not least, the final essential step is to ensure the mirror's physical presence doesn't interfere with your bike's operation or other accessories. Before finalizing your purchase, you need to visualize how the mirror sits on your bike.
How to verify fitment:
- Review Technical Diagrams: Most mirrors sold online include a dimensional diagram on the product page. Use these dimensions to estimate the height and reach of the mirror.
- Use Physical Templates: If you find it difficult to visualize, most KiWAV motorcycle mirrors include a downloadable 1:1 actual-size template on the product page. You can print it out and hold it up to your bike to physically confirm the clearance before you buy.
Once you have your measurements or paper cutout ready, check these three critical areas:
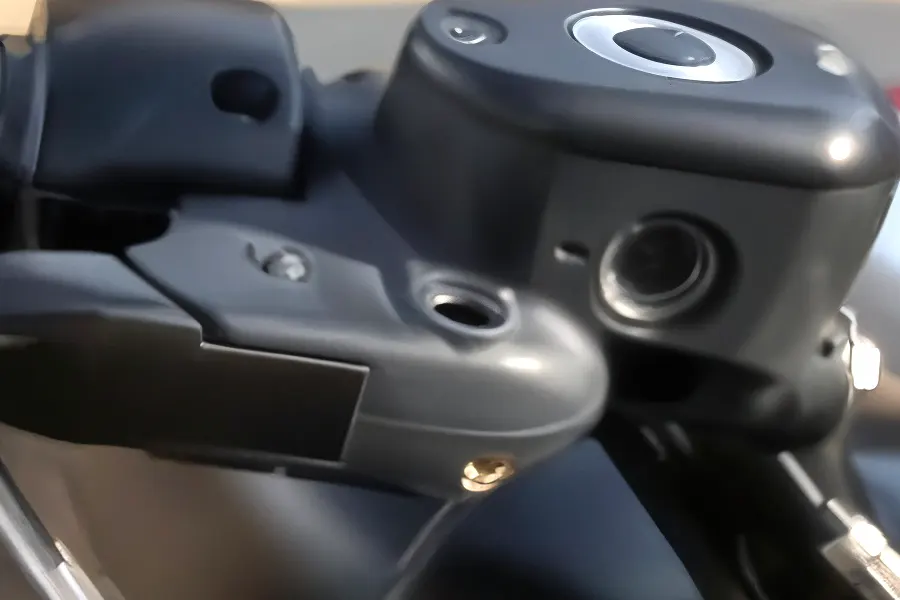
- Reservoir & Control Clearance: Check the width of the mirror base shape to see if the base may hit the edge of the hydraulic reservoir or the control housing, preventing the stud from aligning perfectly with the hole.
- Handlebar Full Lock: Turn your handlebars all the way to the left and right. Check if the mirror stem or glass will hit your windscreen, fairing, fuel tank or even your knee (especially in "underslung" setups) at these extreme angles.
- Under-Perch Clearance: Look beneath the perch to ensure there is enough room to reach in with a wrench or socket to tighten the mounting nut.
Common Handlebar Mirror Fitment Problems
“The mirror thread size looks correct, but it won’t tighten.”
Possible causes:
- Reverse thread mismatch
- Wrong pitch
- Adapter required
- Mirror base bottoms out before locking correctly
“The mirror fits one side but not the other.”
Possible causes:
- One side uses reverse thread
- Left and right hardware are not identical
- OEM perch design differs between sides
“The mirror mounts, but the angle is wrong.”
Possible causes:
- Missing adapter
- Stem geometry mismatch
- Mount shoulder height issue
- Final tightening position does not align correctly
Frequently Asked Questions
Q: What thread size do most handlebar mirrors use?
Most motorcycles over 250cc commonly use M10 x 1.25, while smaller bikes and scooters may use M8 x 1.25. However, some Harley-Davidson and Triumph models use 5/16"-24 imperial threads, so always measure before buying.
Q: My bike has an M10 thread, but my new mirror still won't screw in. Why?
This is likely a Pitch or Orientation mismatch. Even if the diameter is 10mm, your bike might require a 1.25 pitch while the mirror is 1.5, or you might be trying to screw a Standard (Clockwise) bolt into a Reverse (Counter-clockwise) thread. Refer back to Part 1: Step 1 to re-verify these details.
Q: Do all Yamaha mirrors use reverse thread on the right side?
Many Yamaha street bikes do, but not all models follow the same pattern. Always verify the right-side perch thread direction before ordering replacement mirrors or adapters.
Q: Can I install a Perch-Mount (threaded) mirror on a Bolt-Through bike?
Not directly. Bolt-through mirrors use a long smooth stud designed for unthreaded holes. If you want to use that threaded mirror style on a smooth bore perch, you will need a specialized adapter.
Q: My mirror fits the thread, but it hits my brake reservoir. Do I have to return it?
A: Not necessarily. You can often solve this by adding a Mirror Extender or a Threaded Spacer. These small accessories provide the extra "rise" or "offset" needed to lift the mirror base above the reservoir.
Q: Is it safe to use a mirror if the bolt only screws in a few turns?
No. For safety and vibration resistance, a bolt should typically engage at least 5 to 6 full turns. If it only turns 2–3 times before bottoming out or getting stuck, it is prone to vibrating loose or stripping the threads. Check if your bolt is too short or if the pitch is incorrect.
Q: Can I reuse my stock mirror adapters or spacers?
Yes—but only if the thread size, pitch, and seating surface all match the new mirror.
Before reusing OEM spacers or reverse-thread adapters, check:
- Thread diameter
- Thread pitch
- Shoulder height
- Final tightening position
A spacer that worked with your stock mirror may change the final angle or leave the new mirror loose if the stem geometry is different.
Conclusion
Choosing the right mirrors doesn’t have to be a guessing game. By taking a few minutes to identify your mount type and measuring the critical clearances, you ensure not only a seamless installation but also a safer, vibration-free ride. Whether you are aiming for a classic cruiser look or a modern streetfighter aesthetic, the key is in the details.
Once you know your exact thread type and clearance requirements, choosing the right mirror becomes much easier—and far less likely to involve extenders, returns, or trial-and-error.
Further Reading
From here, you can explore: