


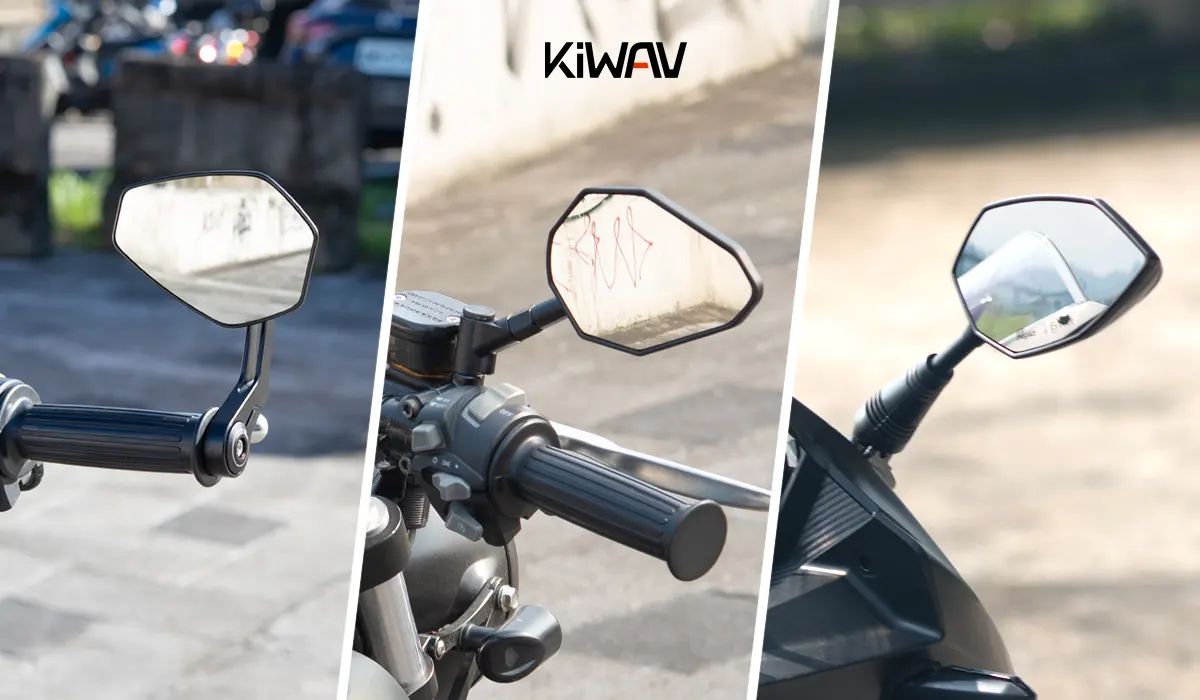
Choosing a motorcycle mirror is not only about style. The biggest question most riders face is simple: will it actually fit the bike correctly?
Many mirror fitment problems come from mismatches in thread size, thread direction, mounting style, required adapters, stem clearance, fairing interference, or handlebar construction. A mirror may look perfect in photos but still fail to install properly on your motorcycle.
This complete guide explains how motorcycle mirror fitment works, how to identify your bike's mounting type, and what to check before buying aftermarket mirrors.
Quick Answer: How Do You Know If a Motorcycle Mirror Fits?
A motorcycle mirror fits only when all of these match:
- Mounting system
- Perch dimensions or bar-end dimensions
- Thread size, thread direction, or fairing bolt spacing
- Required adapters, inserts, or expansion hardware
- Clearance around controls, fairing, windscreen, and fuel tank
- Your real riding position and usable rear visibility
In other words, “compatible” does not just mean “can be bolted on.” A proper fit also means the mirror can be installed securely, adjusted correctly, and used safely in real riding.
Why Motorcycle Mirror Fitment Is More Complicated Than It Looks
A lot of riders assume mirrors are universal. Some mirrors are broadly compatible, but very few are truly universal in real-world installation.
For example, even when two motorcycles both use 10mm mirror mounts, they may still differ in:
- Thread orientation
- Thread pitch
- Perch shape
- Spacer requirement
- Stem clearance
- Fairing interference
- Bar-end construction
- Original bar-end weight design
That is why the same mirror may fit one motorcycle perfectly, while another bike needs special adapters, spacers, or a completely different mounting solution.
Identify Your Mirror Mounting Type
Before checking fitment, the first step is to identify which mounting style your motorcycle uses.
1. Handlebar Mirrors
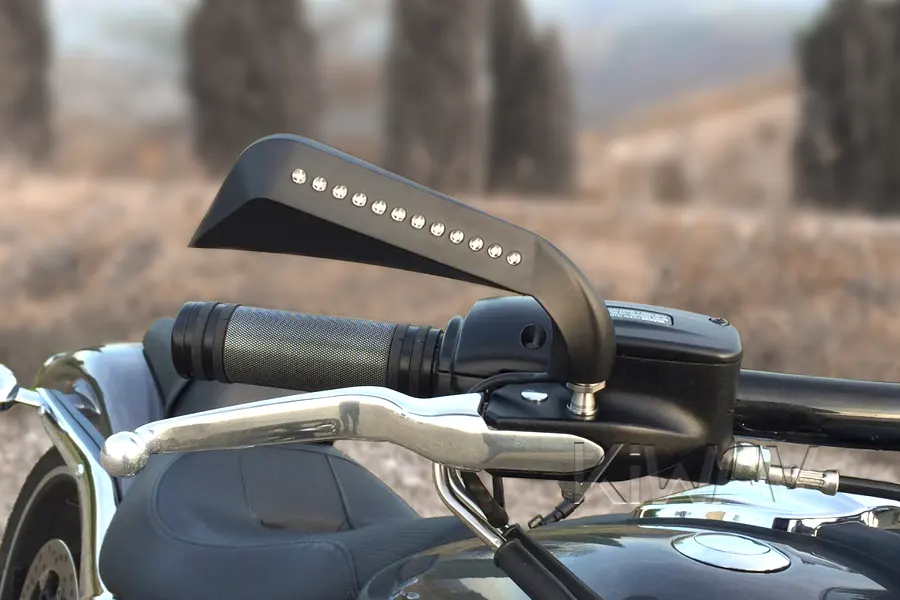
This is the most common motorcycle mirror setup, found on everything from street bikes and scooters to cruisers and touring motorcycles.
Handlebar mirror mounts near the clutch perch or brake master cylinder, using one of two common systems:
- Perch-Mount (Internal Threads)
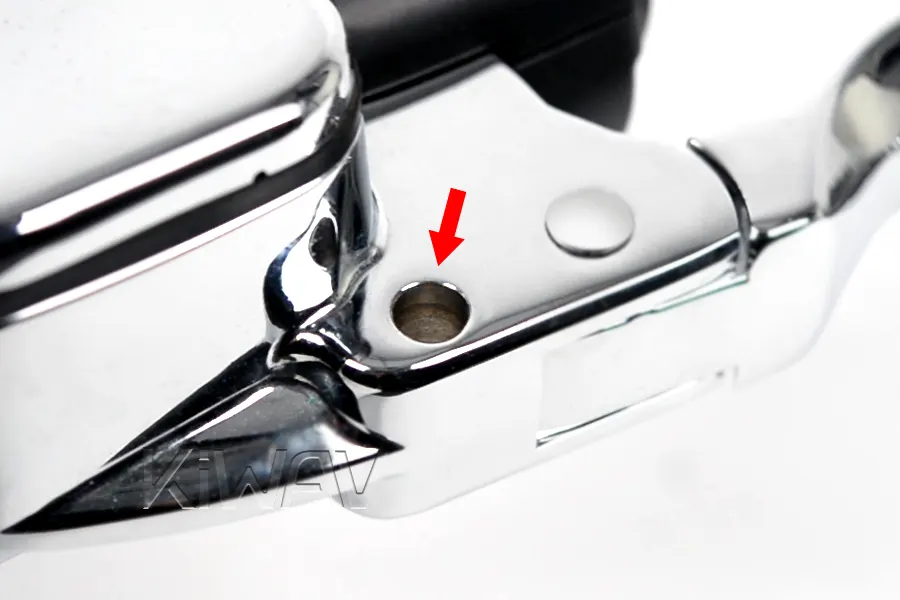
- Bolt-Through (Open Hole)
Typical signs:
- Stock mirrors rise from the lever perch area
- The bike has either:
- a visible threaded mirror seat, or
- a smooth open hole in the switch housing or perch
Because this mounting position works with natural eye movement and upright visibility, it is the default mirror system on the vast majority of motorcycles outside of fairing-mounted sport bikes.
2. Bar-End Mirrors

Bar-end mirrors mount at the outer end of the handlebar, rather than near the clutch perch or brake master cylinder.
This setup is especially popular among riders looking for a cleaner silhouette, reduced shoulder blockage, and a lower-profile appearance.
Bar-end mirrors fitment depends on one of three mounting systems:
- Clamp-On Mounting
- Threaded Mounting
- Expansion Components Systems
Typical signs:
- The mirror sits at the very end of the handlebar
- Fitment depends heavily on the internal and external structure of the handlebar
For bar-end mirrors, installation require removing bar-end caps, OEM bar-end weights or throttle-side inserts.
3. Fairing Mirrors
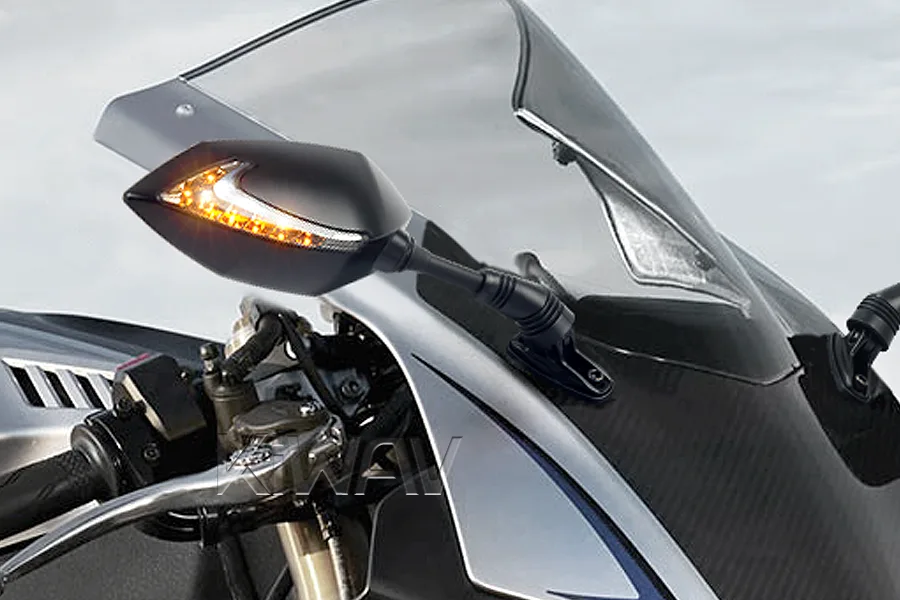
Some sport bikes and fully faired motorcycles use mirrors mounted to the front fairing or upper cowl, rather than the handlebar.
Typical signs:
- The mirror base bolts directly to the front cowl or upper fairing
- The base shape must match the bike’s fairing bolt spacing and mounting contour
- Mirror arm length and angle affect windscreen and shoulder visibility
For fairing mirrors, fitment is not only about C.C. distance and base footprint. The viewing angle, adjustment range, and fairing clearance also need to work with your riding position.
How to Confirm Mirror Fitment Before You Buy
To find the perfect fit, you first need to look closely at your bike's existing mounting points. Follow the category that matches your motorcycle's setup:
1. For Handlebar Mirrors
Before checking thread sizes, you must determine how the mirror attaches to your handlebar controls. This usually falls into one of two categories:
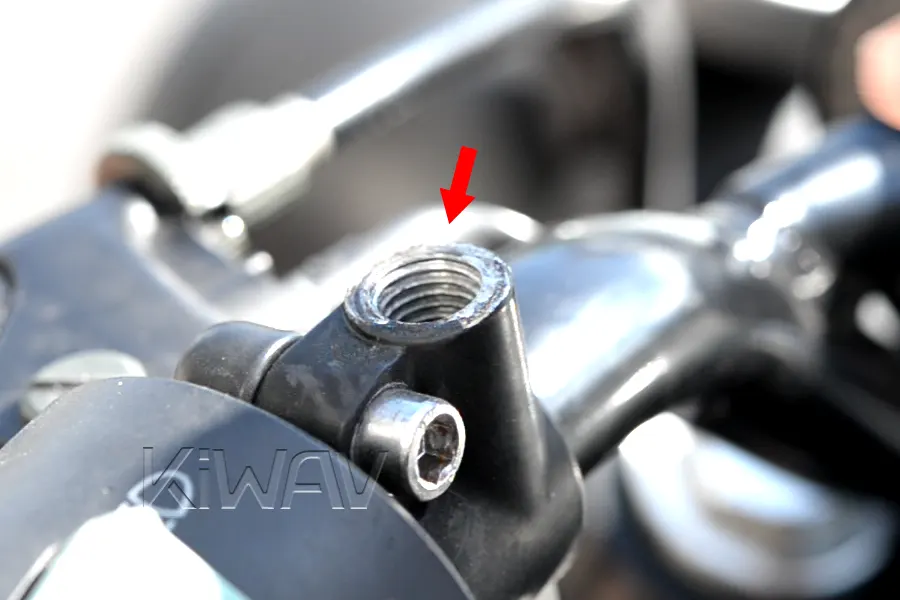
- Perch-Mount (Threaded Socket):
The mirror screws directly into a threaded hole on your clutch or brake perch. This is the most common setup for Japanese and European street bikes.
- What to check next:
You will need to identify the thread diameter (usually M8 or M10) and the thread orientation (standard clockwise vs. counter-clockwise).
- What to check next:
- Bolt-Through Mount (Smooth Bore):
Commonly found on many Harley-Davidson models, this setup features a smooth, unthreaded hole. A long mirror stud passes through the hole and is secured with a nut at the bottom.
- What to check next:
You must confirm the stud length. A stud that is too short won't reach the nut, while one that is too long may not tighten securely or could interfere with other controls. Finding the "goldilocks" length is key for a stable install.
- What to check next:
Prepare for the Next Step
Before you move on, have these ready:
- Caliper, Ruler, or Thread Gauge: To measure thread diameter or stud length.
- Wrench or Allen Key: You’ll need these to remove your stock mirrors and inspect the mounting threads or hole depth.
Which guide do you need?
For Bar-End Mirrors
Bar-end mirror fitment isn't about the mirror itself, but the internal and external structure of your handlebar ends.
Identify which bar-end category your bike falls into:
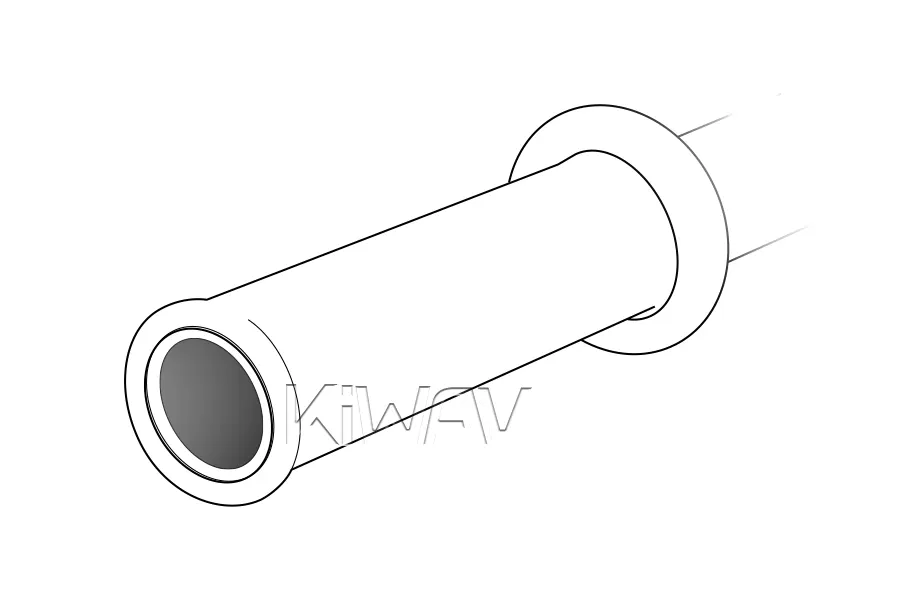
- Hollow Bars:
The handlebar is a hollow tube with no obstruction inside.
- What to check next:
You need to measure the Internal Diameter (I.D.) to confirm whether it accepts expansion components. **Alternatively, measure the Outer Diameter (O.D.) and confirm there is enough usable outer tube space for clamp-on mounting. *On some modern motorcycles with electronic throttle control (ride-by-wire), the throttle side may only support clamp-on mirrors.
- What to check next:
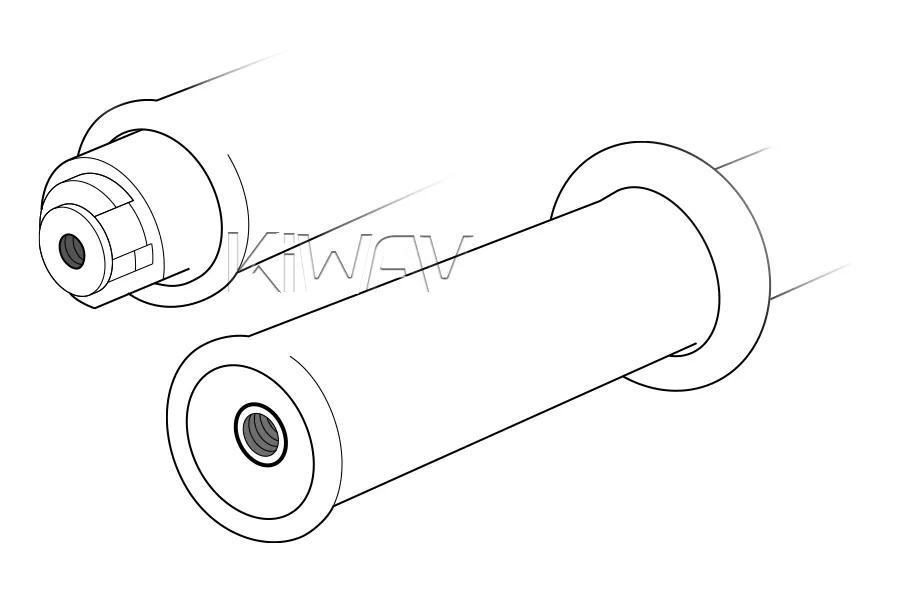
- Threaded Bars:
The handlebar has a threaded insert welded or pressed inside. These are common on many OEM bars to secure factory weights.
- What to check next:
You must identify the bolt size for threaded mounting. You also need to check if the bar-end surface is flat, recessed, or protruding, as this affects how the mirror base sits. Alternatively, measure the Outer Diameter (O.D.) and confirm there is enough usable outer tube space for clamp-on mounting.
- What to check next:
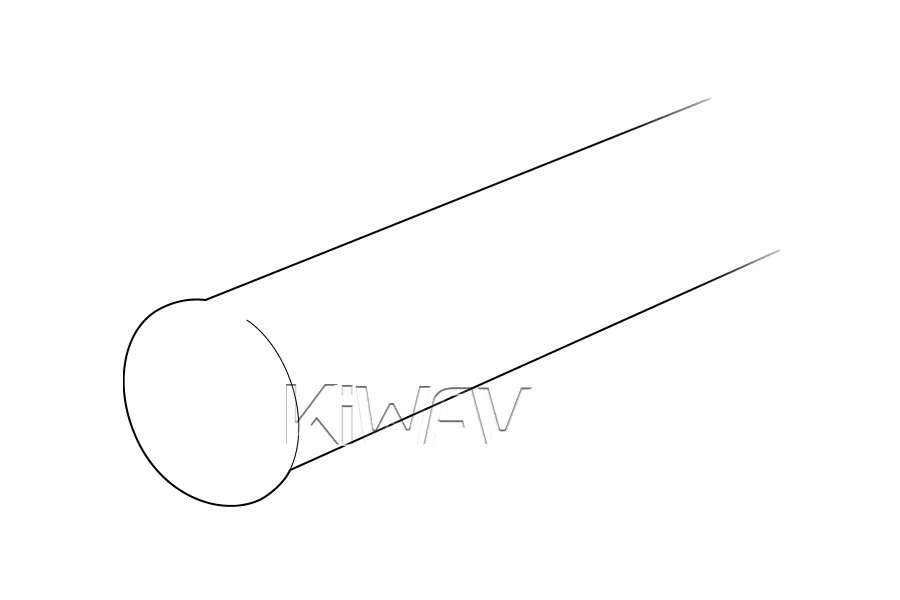
- Solid Bars:
Some handlebars are solid metal at the ends or have permanent plugs that cannot be removed.
- What to check next:
Since internal mounting is not an option, you must focus on clamp-on fitment. You will need to measure the Outer Diameter (O.D.) of the bar and ensure your grips can be moved inward to create enough mounting surface.
- What to check next:
Prepare for the Next Step
Before you move on, have these ready:
- Caliper or Ruler: To measure both the Internal Diameter (I.D.) and Outer Diameter (O.D.) of your bars.
- Allen Key or Screwdriver: To remove your current bar-end weights or caps for inspection.
- Flashlight: To check for internal threads, welds, or obstructions inside the bar.
- Note on Grips: If your bike has closed-end grips, you may need a utility knife to trim the ends or consider replacing them with open-end grips to allow for bar-end installation.
Which guide do you need?
For Fairing Mirrors
Standard on most sport bikes and supersports, these mirrors bolt directly to the front cowl. Fitment here is highly specific because the fairing is a fixed, molded part of the bike.
Identify the three key factors for your fairing setup:
- Bolt Configuration:
Most fairing mirrors use a two-bolt mounting base.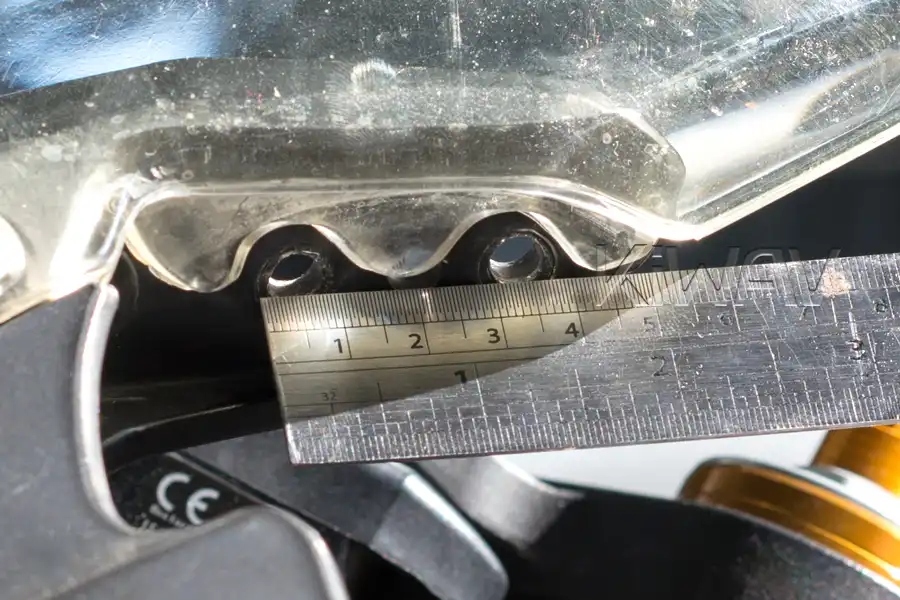 What to check next:
You must identify the bolt size for threaded mounting. You also need to check if the bar-end surface is flat, recessed, or protruding, as this affects how the mirror base sits. Alternatively, measure the Outer Diameter (O.D.) and confirm there is enough usable outer tube space for clamp-on mounting.
- Mounting Surface (Base Footprint):
The area where the mirror sits often has a recessed pocket or a specific contour (curved surface).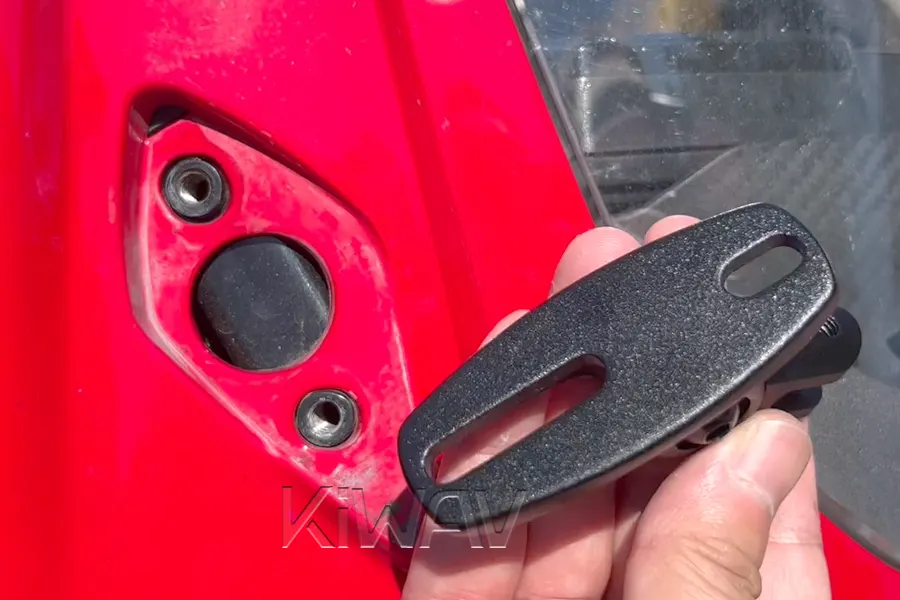 What to check next:
Check if your fairing mounting surface is flat or contoured. An aftermarket mirror with a flat base may not sit flush on a curved fairing without a specific adapter or gasket.
- Adjustment Range:
Fairing mirrors are mounted far from the rider. Because of the aggressive, lean-forward riding posture of sport bikes, the mirror’s arm length and pivot angle are critical.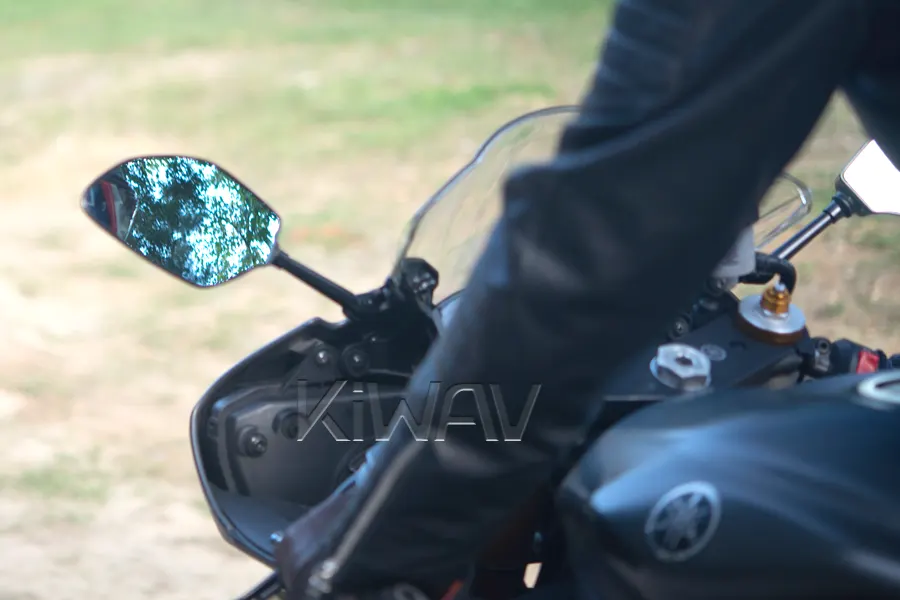 What to check next:
Ensure the mirror's stem length and adjustment range allow for a clear rear view past your shoulders. Since the mounting point is fixed, finding the right geometry for your specific riding position is the key to safety.
Motorcycle Mirror Fitment Checklist Before You Buy
Before you buy, run through this final checklist to ensure a frustration-free purchase experience. Taking two minutes to verify these details now will save you the hassle of a return later. If you can confidently check off these points, your mirrors will be a perfect fit—no surprises.
Frequently Asked Questions
Q: Are motorcycle mirrors universal?
Not exactly. Some mirrors are broadly compatible, but they are "Universal Fit" within their specific category. For example, a mirror may be universal for all industry-standard 10mm threaded perches or most sportbike fairing hole spacings.
Because motorcycles vary, "universal" simply means it fits a wide range of bikes within those specs. We always recommend checking the Product SPEC to confirm it matches your bike’s specific mounting type and size.
Q: How do I know my motorcycle's mirror thread size?
The most reliable way is to remove the stock mirror and measure the thread diameter with a thread gauge or caliper. Most motorcycles use M8 or M10 threads, though the orientation (standard vs. reverse) and pitch (1.25mm vs. 1.5mm) vary by brand.
Don't have a thread gauge? Check out our guide: Two easy ways to identify your bolt size and thread
Q: Can left and right mirror threads be different?
Yes. While most motorcycles use standard threads on both sides, mixed threading is common on Yamaha models. It is also found on specific models from brands like Ducati, Royal Enfield, Aprilia, KYMCO and Zero.
For example, many Yamaha models use a standard thread on the left side and a reverse thread on the right side to prevent the wind from loosening the mirror during rides. Because this setup varies by manufacturer and model year, always check both sides before ordering.
Q: Do I need mirror adapters?
Not always, but adapters are often required when the thread size, thread direction, perch design, bar-end insert, or fairing base footprint does not directly match the mirror.
Adapters are especially common when switching between OEM and aftermarket mirror systems.
Q: Can I install bar-end mirrors on stock handlebars?
Usually yes, but it depends on whether your stock handlebars are:
- Hollow
- Internally threaded
- Solid
- Equipped with ride-by-wire throttle components
The internal structure of the bar ends determines whether you need expansion hardware, threaded adapters, or clamp-on mounting.
Conclusion
Finding the right motorcycle mirrors is the perfect balance of form and function. While aesthetics might be what draws you to a specific design, fitment is what keeps you safe and satisfied on the road. Once fitment is confirmed, choosing style, mirror shape, and field of view becomes much easier.
Further Reading
From here, you can explore: