


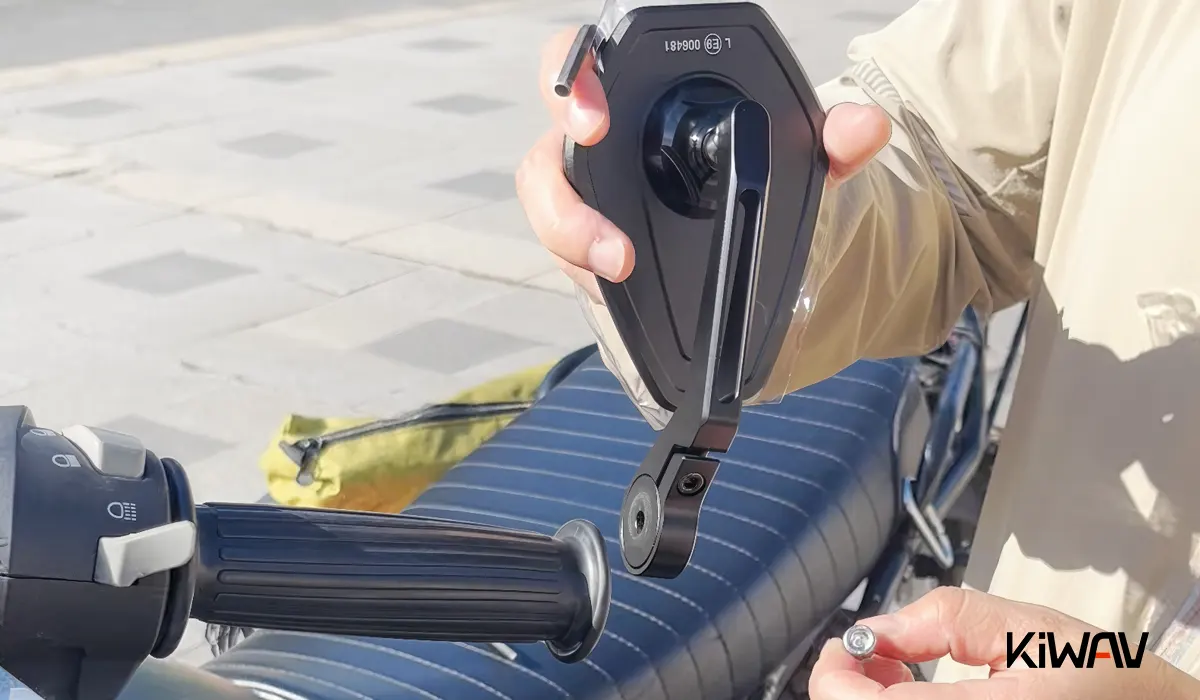
Bar-end mirrors have become one of the most popular motorcycle mirror upgrades in recent years. Riders often choose them for their clean appearance and improved visibility—but when installed incorrectly, bar-end mirrors can introduce safety risks, excessive vibration, or even handlebar damage.
This guide explains what bar-end mirrors are, why they work, how different mounting systems function, and how to install them safely. Whether you ride a modern naked bike or a classic scrambler, this article is designed to help you make informed, technically sound decisions.
Quick Answer: How Do You Install Bar-End Mirrors?
Installing bar-end mirrors typically involves three steps:
- Remove the factory bar-end weight or plug
- Install the mirror using a clamp, threaded mount, or expansion adapter
- Adjust mirror angle and tighten to the correct torque
Always ensure:
- The throttle rotates freely
- Mirrors clear the fuel tank at full steering lock
- Mounting hardware matches the handlebar diameter
What Is a Bar-End Mirror?
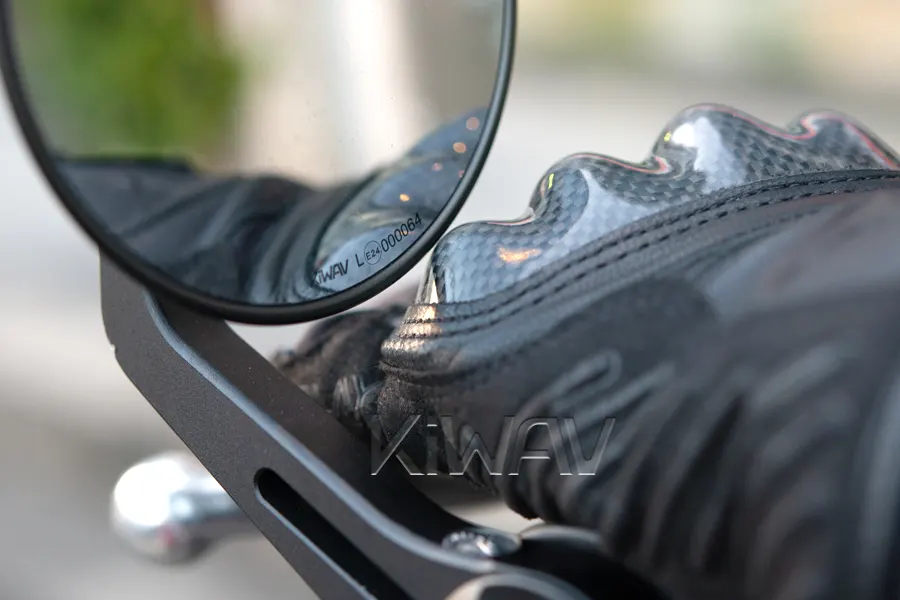
A bar-end mirror is mounted at the outer end of the handlebar, rather than on the mirror seat or control perch. This change in position alters both the mechanical behavior of the mirror and the rider's rearward field of view.
Advantages of Bar-End Mirrors
- Wider rearward visibility: The outboard position moves the reflection beyond the rider's shoulders and elbows.
- Clean appearance: Creates a lower, more aggressive silhouette by clearing the cockpit of upright mirrors.
- Flexible mounting position: Most mirrors allow for four-way positioning (Up, Down, Inward, Outward) to match the bike's specific geometry and style.
Limitations and Trade-Offs
- Installation Precision: Improper mounting can lead to mirror rotation or throttle binding.
- Handlebar Compatibility: Must be matched to the specific internal or external diameter of your bars.
- Increased Total Width: Can impact "lane splitting" or storage in tight spaces unless foldable designs are used.
- Tank Interference: Downward-mounted mirrors may contact the fuel tank at full steering lock on some models.
- Ergonomic Clearance: Sufficient space must be maintained for gloved hands to operate controls without interference.
Bar-End Mounting Systems: Complete Classification
Not every motorcycle is ready for a "plug-and-play" bar-end installation. Bikes equipped with heated grips, electronic throttles (Ride-by-Wire), or handguards may require specific adapters or modifications. However, for the vast majority of motorcycles, a bar-end setup is a rewarding and achievable upgrade.
Understanding your specific mounting system is the key to long-term stability and safety.
A. Clamp-On Mounting
This system attaches externally to the handlebar end using a reduction ring or sleeve.
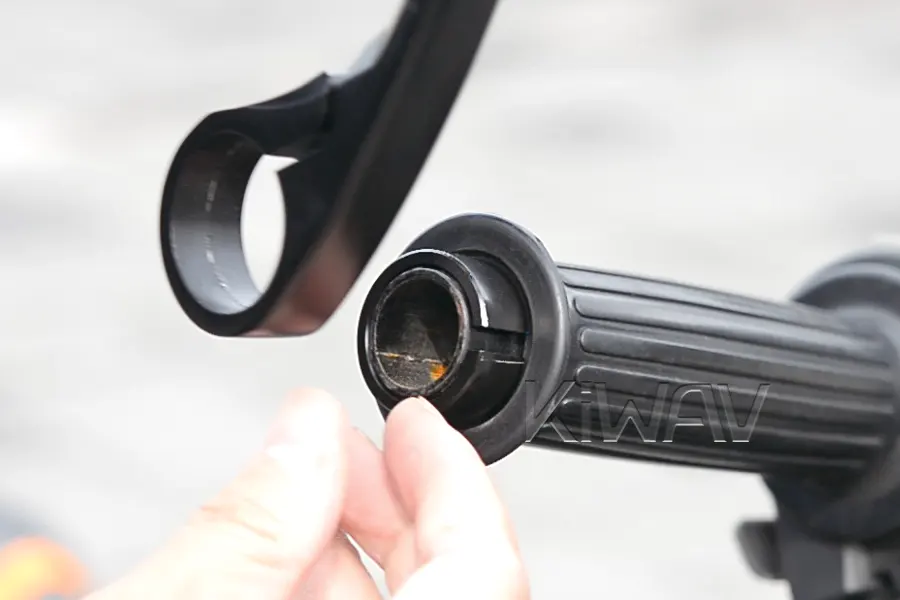
Characteristics:
- No need to remove internal components.
- Ideal for bikes with solid bars or those where internal access is restricted.
- Requires precise fitment of the reduction ring to prevent slipping.
B. Threaded Mounting
This system screws directly into the internal threads already present in many OEM (factory) handlebars.
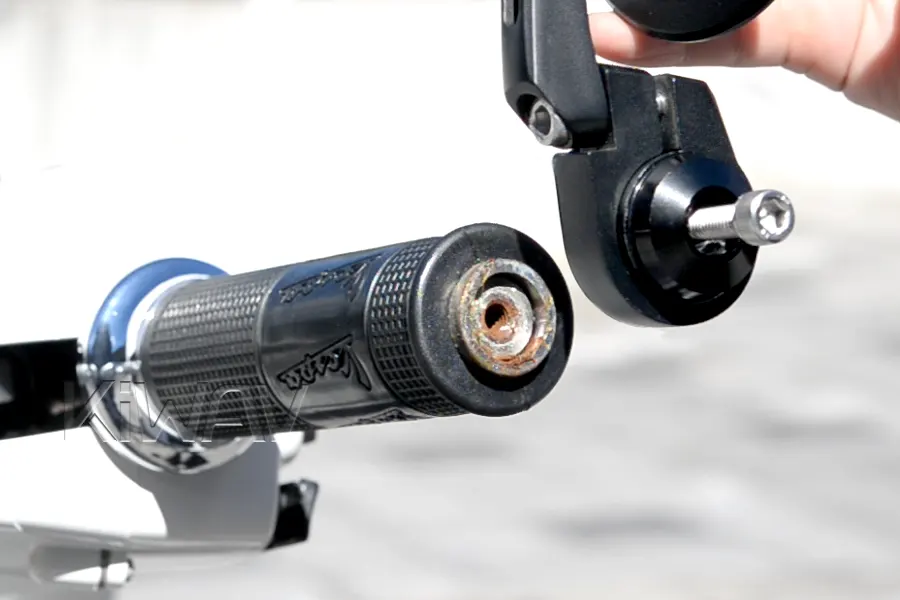
Characteristics:
- Requires factory-threaded bars or adapters.
- OEM weights may need removal or replacement.
- Some models require dedicated adapters.
- Improper removal can damage internal threads.
C. Expansion Components Systems
The most versatile and common universal mounting method for hollow handlebars.
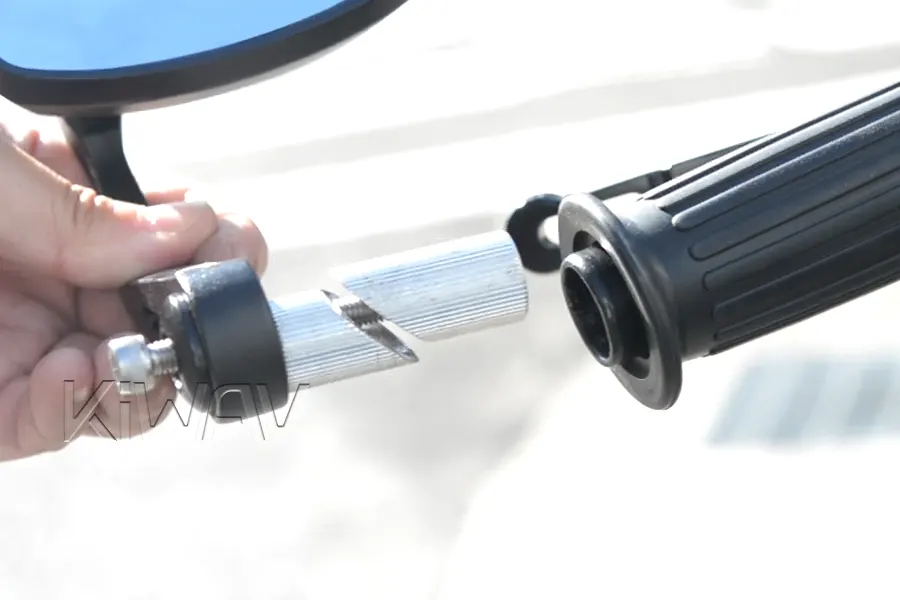
Characteristics:
- Only work on hollow-core bars (7/8" or 1").
- Wide compatibility.
- Strong resistance to rotation when properly installed.
Compatibility Checklist
Before purchasing bar-end mirrors, check these factors:
1. Handlebar Inner Diameter
Most expansion mounts require hollow handlebars with an internal diameter between 14.5–25 mm.
2. Factory Bar-End Weights
Some motorcycles use threaded inserts that require specific mirror adapters.
Before removing or replacing the original weights, see what motorcycle bar-end weights do and why a different weight can change vibration at the grips.
3. Ride-By-Wire Throttle Tubes
Modern electronic throttles often extend to the end of the handlebar, leaving very little installation space.
4. Heated Grips
Heated grip wiring can block internal expansion mounts.
5. Handguards
Adventure bikes may require handguard-compatible mirrors or offset mounts.
Working through this checklist is easier with concrete examples in front of you. This comparison of 2026 bar-end mirrors by bike type includes a quick-reference table showing which models use threaded, bolt-on, or clamp-on mounting and the bar sizes they fit, along with heavier models that help damp vibration.
How to Install Bar-End Mirrors
Pre-Installation Checklist:
- Measure Your Bars: Confirm the outer and inner diameters to select the correct mounting hardware.
- Check Clearances: Determine if the mirror should be mounted Upward or Downward. *Downward mounting often provides a cleaner look but may contact the tank or your knees at full lock.
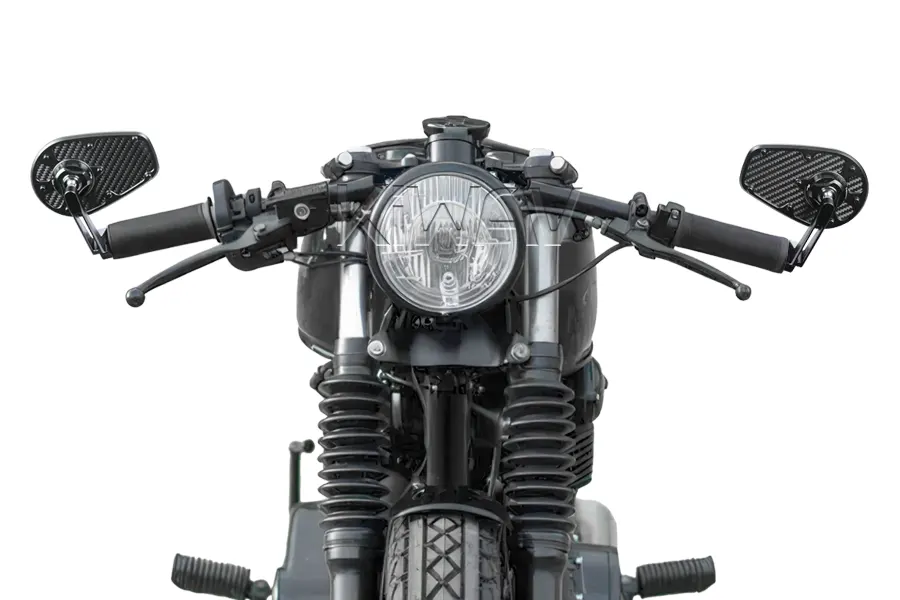
Upward 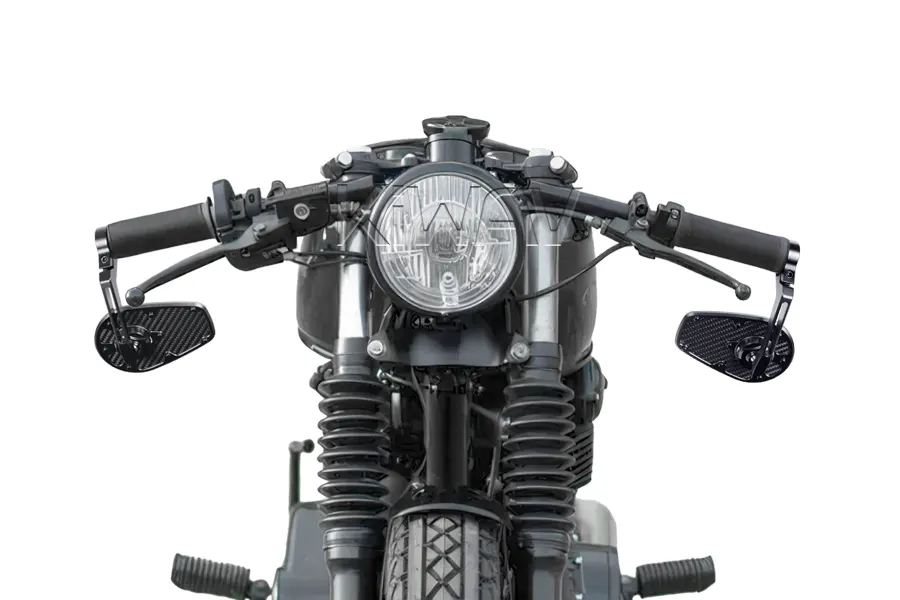
Downward
A. Installing Clamp-On Mirrors
Tool Needed: Allen key (Hex wrench), rubber mallet, thick cloth (rag).
Installation Steps:
- Fit the Reduction Ring: Select the appropriate ring size. Use a rubber mallet with a thick rag over the part to protect the finish while tapping it onto the bar end.
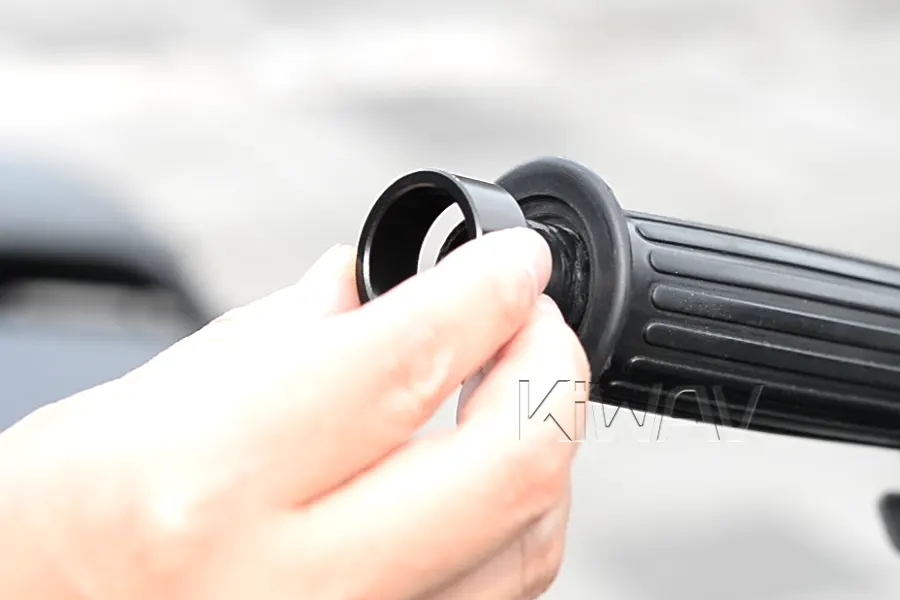
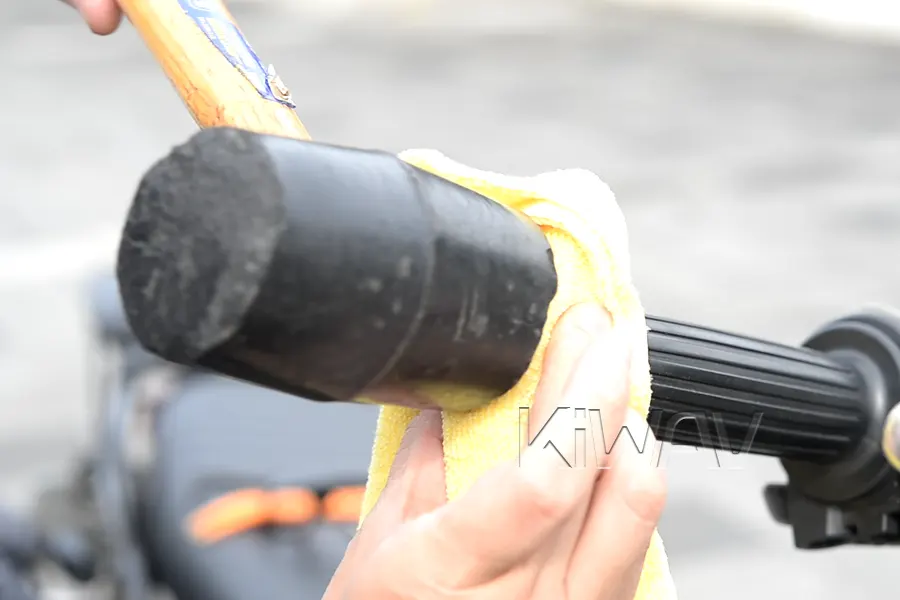
- Position the Stem: Loosen the lock bolt on the mirror stem and put the mirror into the handlebar per the direction you desire.
- Alignment: Ensure the mirror is centered and positioned evenly, then gently tap it onto the reduction ring.
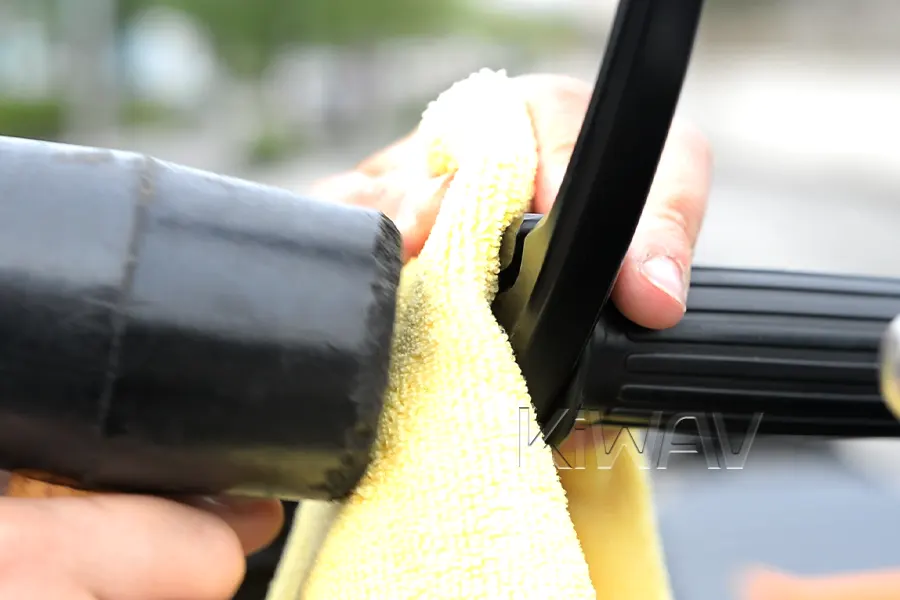
- Secure: Adjust the position of the mirror plate and stem, then tighten the lock bolt securely.
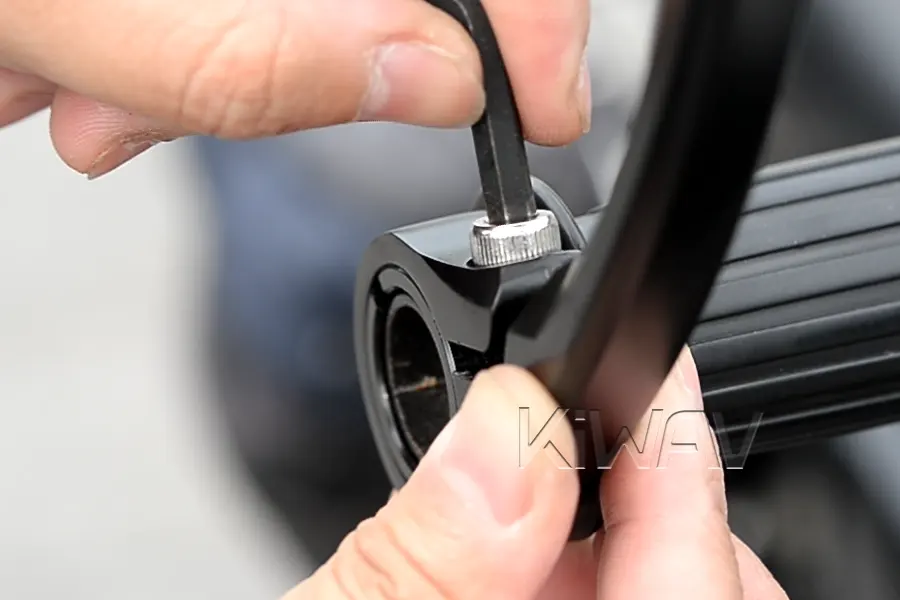
Visual Learner? Confused about the reduction ring? → Watch the step-by-step video: [Tutorial] How to Install a Clamp-on Bar End Mirror?
B. Installing Threaded Mirrors
Tool Needed: Allen key (Hex wrench).
Installation Steps:
- Identify Thread Pitch: Ensure your mirror bolt matches the internal threads of your handlebar.
Are you sure about your thread size? → Watch this video: 2 ways to identify your bolt size and thread
- Mounting: Put the mirror assembly into the handlebar per the direction you desire.
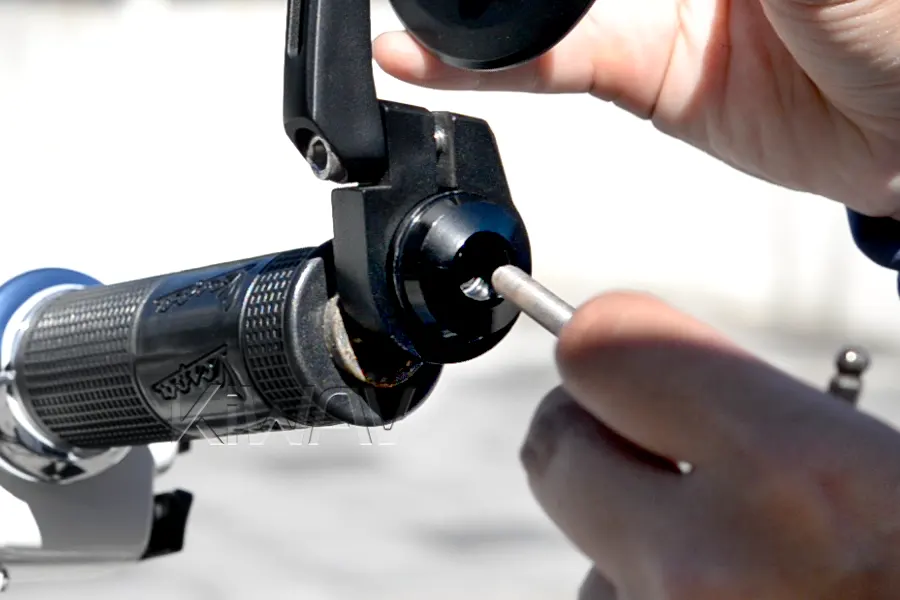
- Final Torque: Tighten the bolt to the manufacturer's recommended torque.
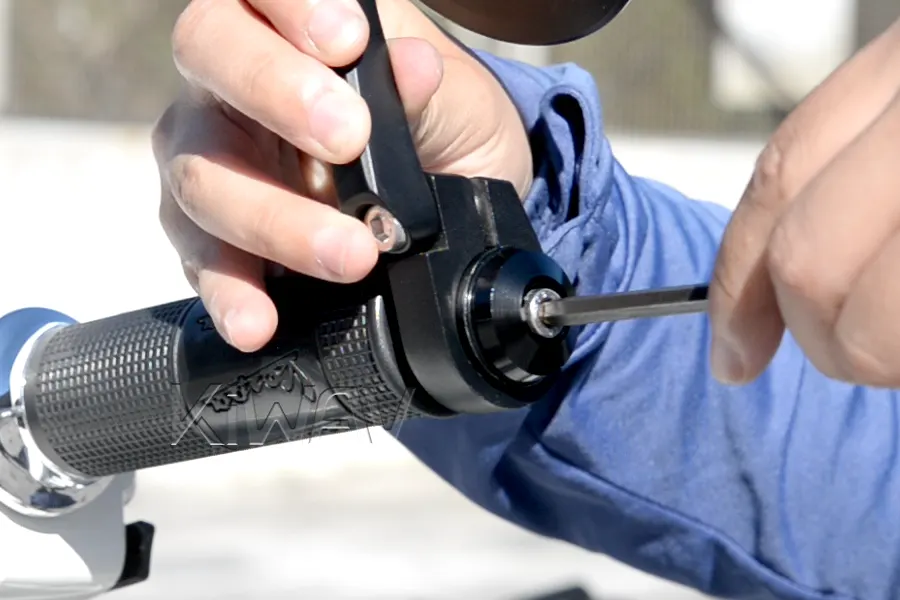
- Orientation: Adjust the position of the mirror plate and stem, then tighten the lock bolt securely.
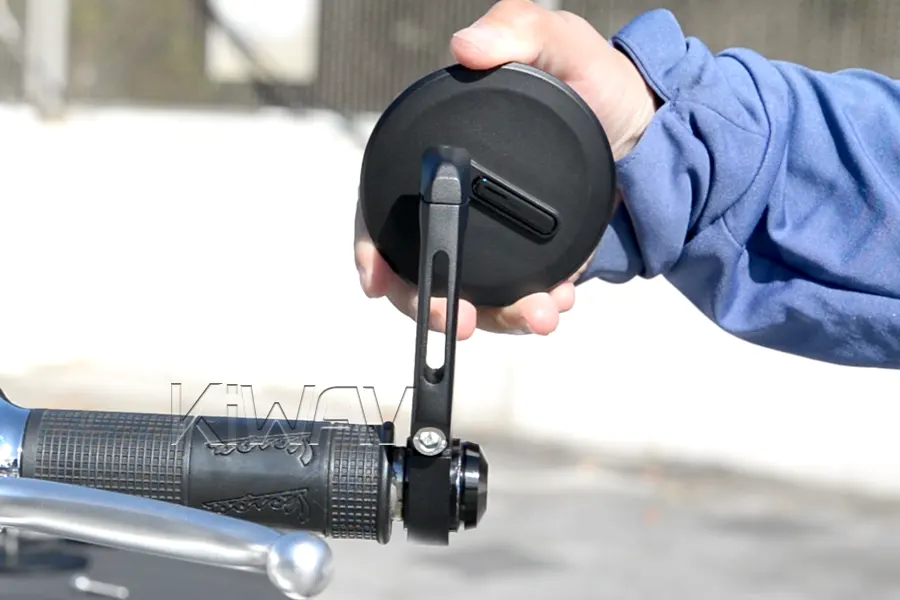
C. Installing Expansion Systems
Tool Needed: Allen key (Hex wrench).
Installation Steps:
- Identify: Select the right set of expansion components that fit into the handlebar.
- Assembly: Assemble the expansion sleeves onto the bolt. Hand-tighten them slightly so the components stay together but can still slide into the bar.
- Insertion: Slide the expansion assembly into the hollow handlebar.
- Setting the Gap: Ensure there is a small gap (approx. 2-3mm) between the mirror mount and the throttle grip to prevent the throttle from sticking.
- Tightening: As you tighten the bolt, the internal components will expand and "bite" into the inner wall of the handlebar for a secure fit.
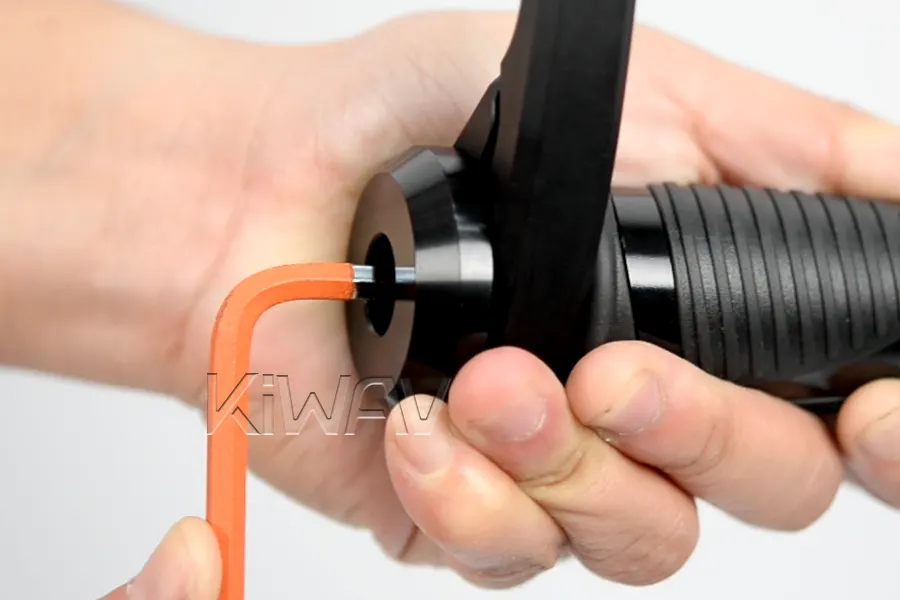
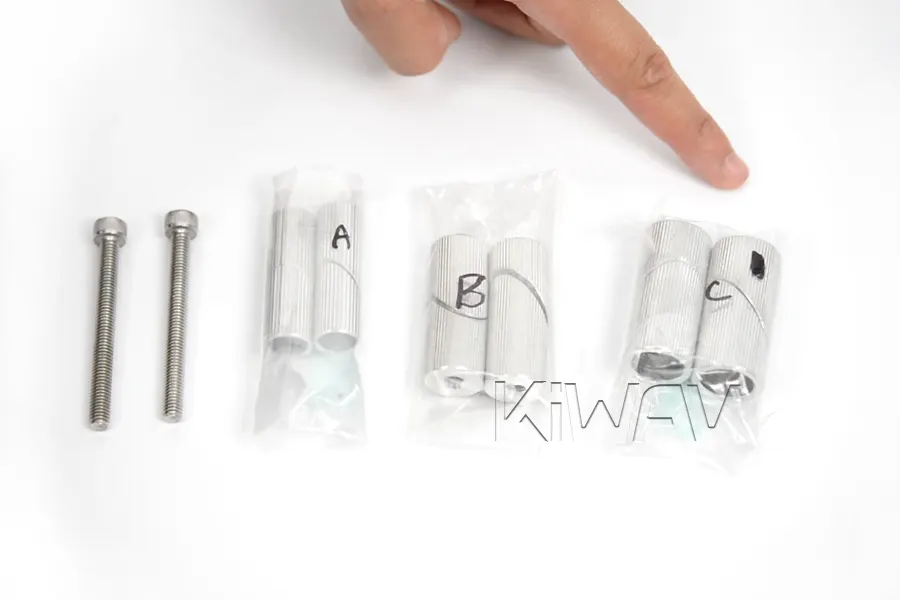
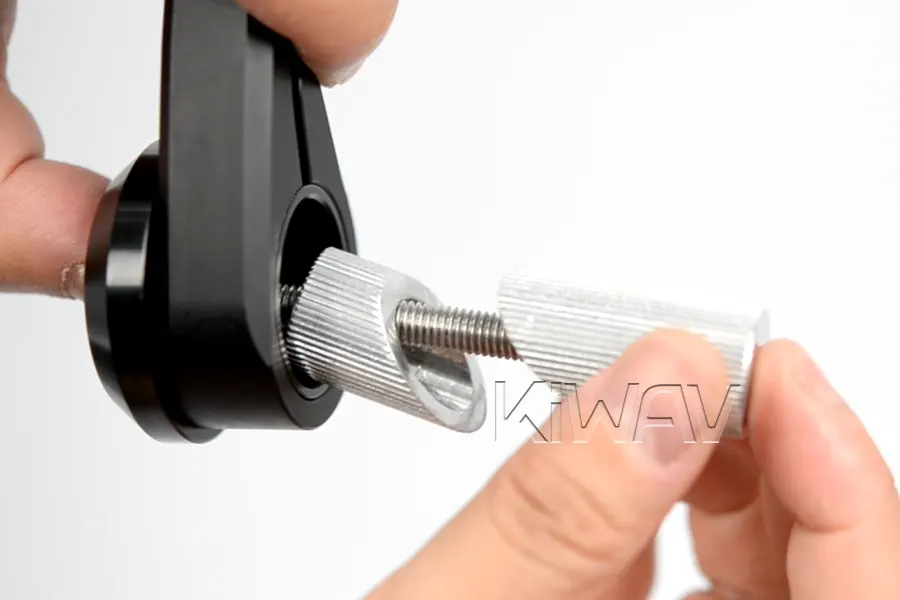
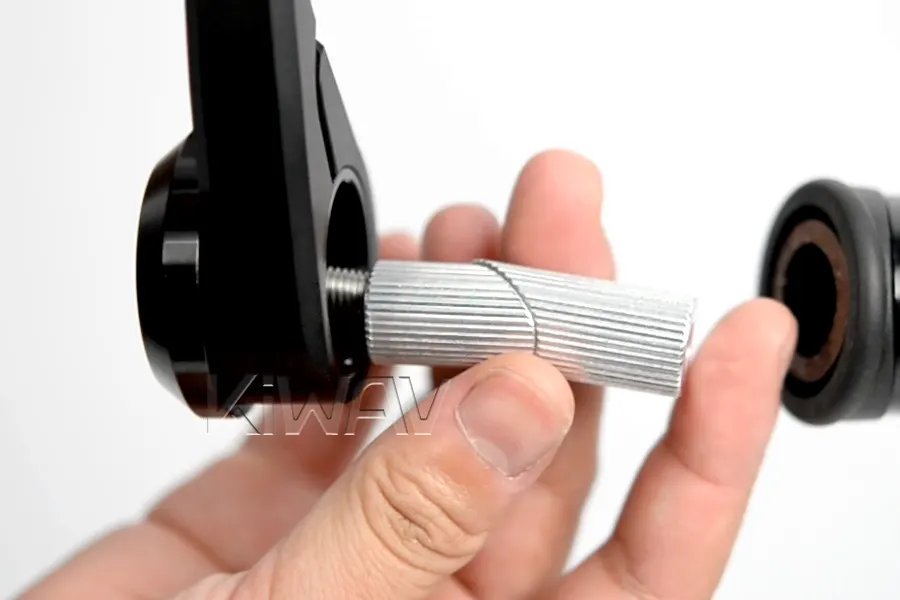
Visual Learner? Confused about the expansion sleeves? → Watch the step-by-step video: [Tutorial] How to Install Bar End Mirrors via Expansion System?
How the System Work:
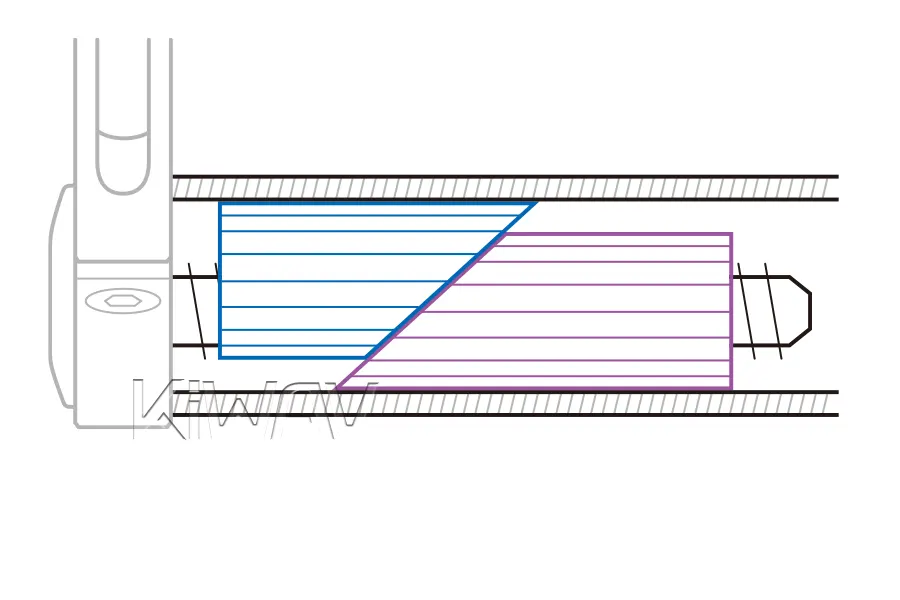
When the bolt is tightened, the tapered cone pulls into the expansion sleeve.
This forces the sleeve outward against the inner wall of the handlebar, creating friction that locks the mirror assembly in place.
Check Steering Lock Clearance
After installation, always turn the handlebars fully left and right.
Verify that the mirrors do not:
- Touch the fuel tank
- Contact fairings
- Interfere with windshields
- Hit handguards
This issue is particularly common when mirrors are mounted downward.
A mirror that touches the tank can cause damage during parking maneuvers or low-speed turns.
Pro-Tips for a Perfect Setup
Angle Adjustment (Horizontal and Vertical)
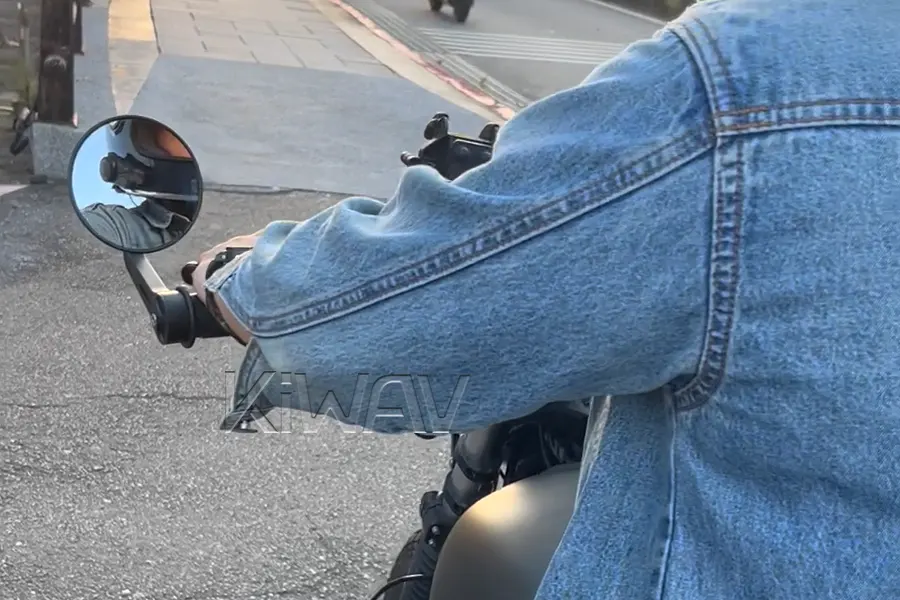
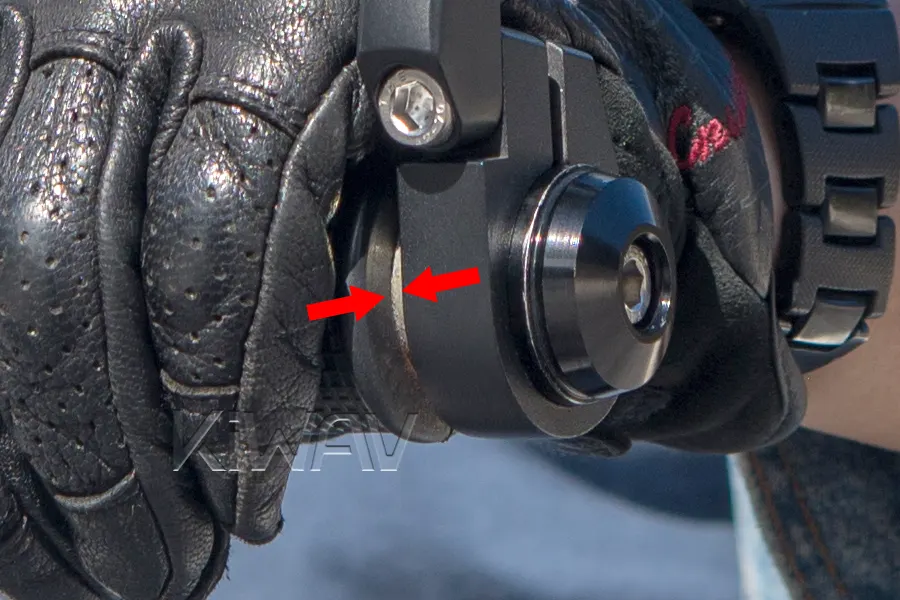
- Ergonomic Adjustment: Always sit on the bike in your actual riding position when setting final angles.
- Throttle Safety: Crucial! Always check that the throttle snaps back freely after installation. The mirror must not touch the rotating throttle grip.
- Hand Movement: Adjust the vertical angle first by consider the mirror stem style to avoid interfere the hand movement while riding.
- Symmetry: Use visual reference points (like the levers) to ensure the left and right mirrors are aligned symmetrically to reduce visual fatigue.
Preventing Loosening Over Time
- Recheck after the first ride
- Avoid low-grade fasteners
Handlebar End Debris
If your motorcycle previously used bar-end weights, check inside the handlebar for:
- Thread locker residue
- Corrosion
- Leftover expansion plugs
Clean the interior before installing a new expansion mount to ensure proper grip.
Common Mistakes to Avoid
Incompatible Bolts or Expansion Components
Forcing a bolt with the wrong thread pitch into a threaded bar will permanently strip the internal threads, requiring costly repairs. Similarly, expansion components must precisely match the internal diameter and wall thickness of the handlebar; a mismatched sleeve will never achieve a secure mechanical bond.
Low-Quality Expansion Sleeves
Inferior, generic sleeves often use softer alloys or plastics that compress unevenly. Over time, this results in:
- Mirror Rotation: The mirror moves or "droops" at highway speeds or under wind pressure.
- Loss of Clamping Force: The assembly may vibrate loose, potentially falling off during a ride.
- Increased Vibration: A poor connection fails to dampen vibration, leading to a blurred reflection.
Over-Tightening and Handlebar Deformation
More torque is not always better. Applying excessive force to secure a loose fit can:
- Ovalize Aluminum Handlebars: Thin-walled bars can become deformed, making it impossible to install other bar-end accessories later.
- Damage Internal Coatings: Especially on carbon or high-end alloy bars, over-tightening can lead to stress fractures.
- Permanently Weaken the Bar Structure: Excessive clamping stress creates a failure point near the end of the bar.
Safety Warning: Most installation-related failures do not happen immediately. Issues like bolt loosening or sleeve fatigue often manifest weeks later due to constant road vibration. Always perform a "nut and bolt" check after your first 100 miles with new mirrors.
Frequently Asked Questions
Q: Why are bar-end mirrors often more stable than stock mirrors?
Because they move the mirror mass away from high-vibration mounting points and reduce resonance amplification.
Q: Do I need to change my handlebar to install bar-end mirrors?
In most cases, no. Proper adapters allow installation on OEM handlebars.
Q: Will bar-end mirrors make my bike too wide?
Width increase depends on mirror size and folding capability. Foldable designs mitigate this issue.
Final Thoughts
Bar-end mirrors are one of the most effective visibility upgrades for modern motorcycles. When properly installed, they often provide a wider field of view and reduced vibration compared with many stock mirror setups.
However, successful installation depends on selecting the correct mounting system and ensuring compatibility with your handlebars and controls.
By understanding the different mounting systems and following proper installation practices, riders can achieve a bar-end mirror setup that is stable, safe, and optimized for real-world riding conditions.
From here, you can explore: